Tuesday, 4 June 2013

Playing with Acrylics.

Good evening everyone.

Today was a glorious day and a day off from college as I have passed the classes I had on for today so didn't need to go in.  Was given a directed study day and really glad I was because the weather was stunning.

So I spent some time sitting outside in the garden just sketching and playing around with a few ideas.
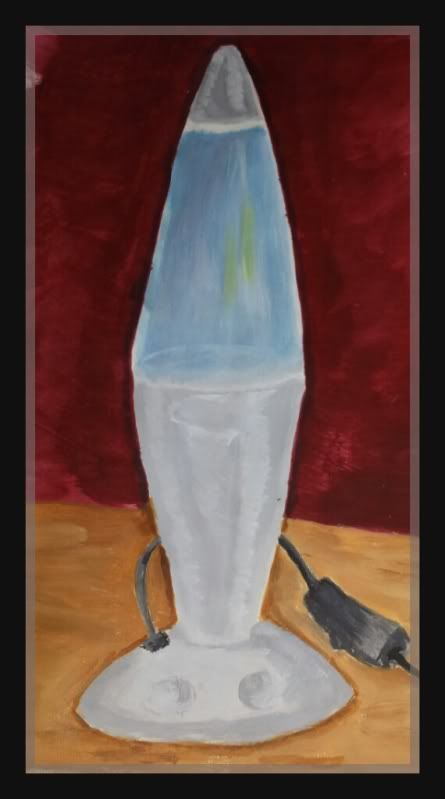
Came back inside for a while and decided to have a wee practice at painting. Not really my strong point and it shows but it was fun to try out.

Just a quick post from my phone so please excuse any mistakes.

Take care everyone and thanks for dropping by.


Jackie xx

Wednesday, 29 May 2013

Mixed Media.

I have had this idea in my head for ages but couldn't really do anything about it until now.

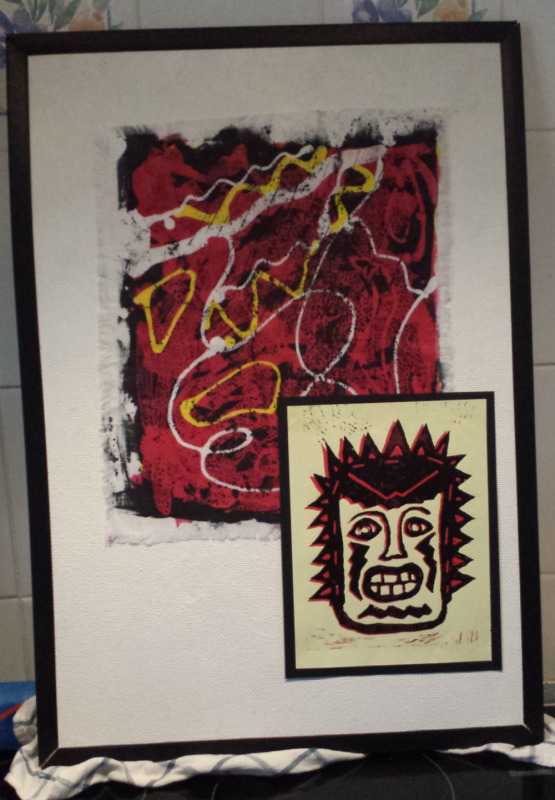
First of all the big background piece is a Batik piece that was created for Textiles, the smaller piece is a lino print and that was done in Printmaking class a few weeks after. The fact that these two pieces go really well together is a complete accident and something I didn't really pay attention to until I had completed the printmaking images.

I couldn't put this together because the pieces were in sketchbooks which were needed for assessment, so I had to wait until that was done, so as both subjects have now been passed it was okay for me to go ahead.

Many MANY apologies for the seriously naff photograph though, it was late when I got finished and my camera wasn't working so I had to use my mobile phone. That nasty rag is there to stop the picture from sliding down!!

I am going to enter this for the class exhibition. That way there is a piece used involving all the lecturers....does that make sense?

Anyway, I'm off for a while, 'sneaking' this post in while in class, well not really 'sneaking' as everybody can see what I'm doing anyway!!. Finished my class work for now and just waiting on a checklist to see if there's anything else I need to do.

Take care and thanks for dropping by.

Jackie x


Sunday, 26 May 2013

Mixed Media self portrait.

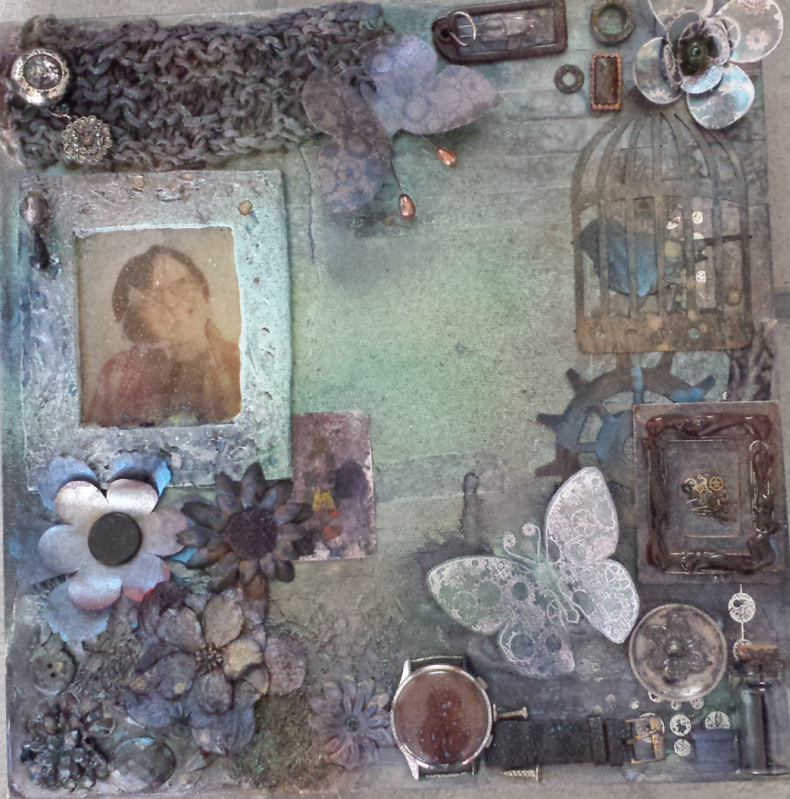
This piece was started as a final project for mixed media class in college. My lecturer wasn't really too happy about me submitting it and wanted me to do something else, which i did and didn't like the end result. So having made a really good start on this and with all the annotation being done I decided I wasn't going to let it go to waste and just finish it off.

It is based on and inspired by Finnabair , who's work I think is amazing !

I won't go into a massive big spiel about the whole piece because I think you can basically see what was used, but I will explain certain techniques in simplified form or else I'd be here for ages lol !

First of all my photograph was loaded into Photoshop, I just used some of the filters to alter it slightly, printed it off the proceeded to rip it up! The frame it's in is actually made from some air drying clay. I used a Sizzix 'Frame' die cut and traced around it, also used a clay work tool to trace through the shapes on the frame. Set it aside to dry and then painted it with acrylic paint. I triple embossed the photograph and when cool, I 'cracked' the embossing. I then stick the photo behind the frame.

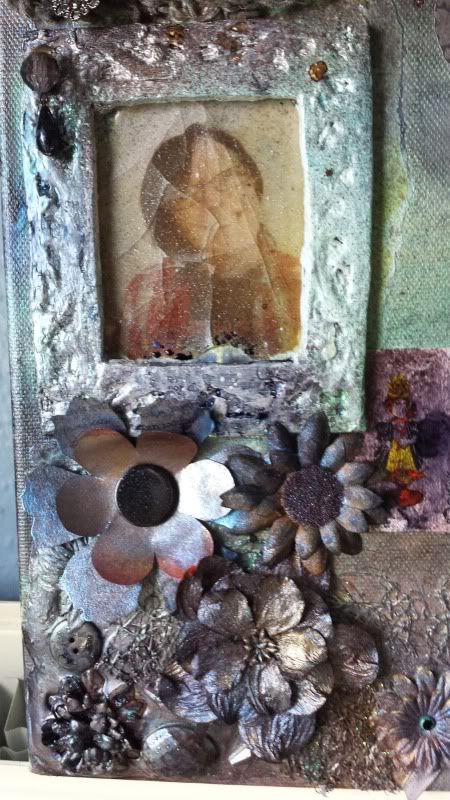
The bottom left hand corner is actually some pollyfilla and pva glue. while this was still wet I embedded some beads, buttons and various other objects also added some fusible fibres and some paper flowers.

The butterflies and 3D roses are from The Artistic Stamper Steampunk range  . I LOVE these stamps and have used them a lot in projects!

All the other 'oddments' are basically 'stuff' that was found in my stash or my 'junk drawer'....now i know you all have one of those!! lol.

Old key fobs, broken jewellery, broken watches, miniature playing cards, etc.

The top left hand corner is a piece of knitting done with ribbon yarn.
Just added various die cuts and a few other bits and pieces.
I sprayed over the whole thing with Glimmer Mists in Blue and Green, Used a darker Blue Cosmic Shimmer and a Copper cosmic Shimmer.
I also used Dylusions Blackand  Brown.


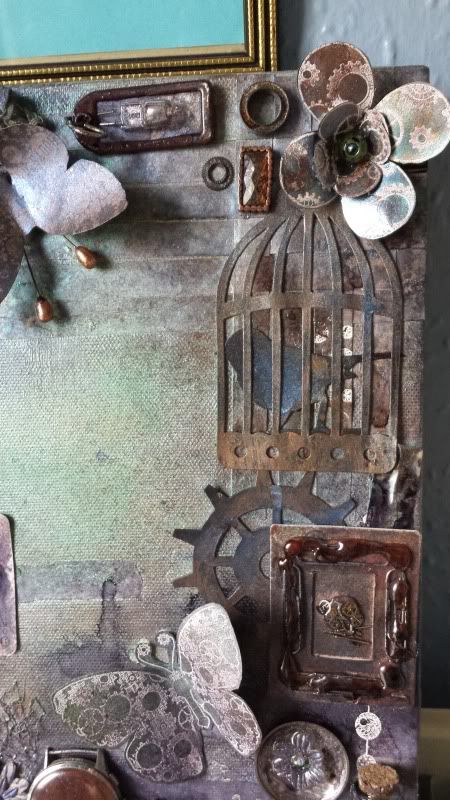
Here are a couple of close ups of the details.... top right hand corner,


Bottom left hand corner....

I am really pleased with the way this has turned out. I am going to take it in to class on Monday anyway just to find out the reaction. I may get to use it as my final piece in the end because all the work is done on it, but we shall see.

Thanks for dropping by, feel free to ask if you have any questions and I'll do my best to help.

Take care and Happy Bank Holiday to those of you who have one. (we had two days at the start of the month in Scotland).

Take care

Jackie xx

Sunday, 12 May 2013

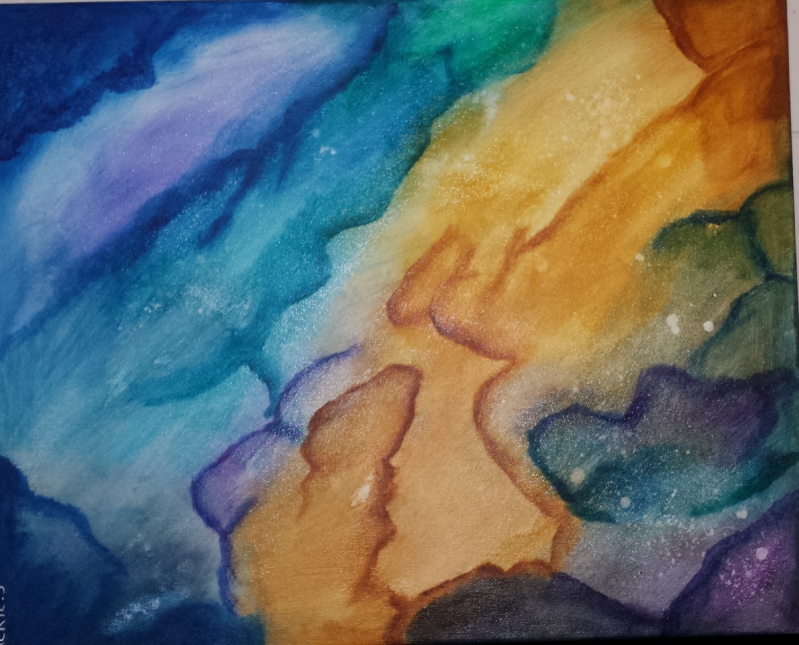
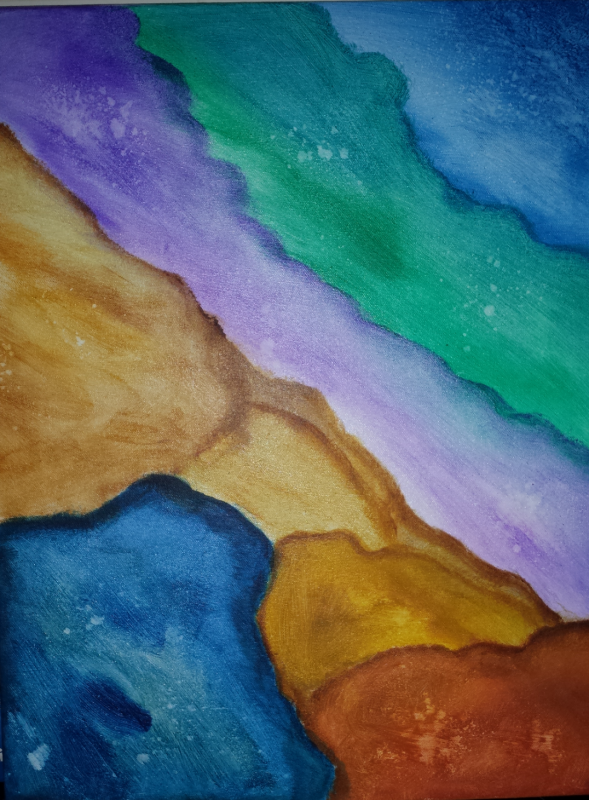
A little "Abstract" !


Just a quick post tonight, been playing with Acrylics paints. I was really just playing with some brush techniques, blending medium and colours. Just wanted to see what I could achieve. Had lots of fun wondering what the end results would be like. A nice welcome distraction to a rather traumatic week!

So I have ended up with two lovely 20 x 16" abstract paintings in lovely rich and strong colours!

I'm off for the night to relax before the mad rush for college tomorrow.

Take care and thanks for dropping by

Jackie x


Monday, 29 April 2013

Final project for Art class is now finished!


Sorry the photos are not up to much but I used my phone as there was no camera available today.

Anyway, I have been working on this piece for months now and I'm glad it's all finished!

There were four 'briefs' to choose from. I chose the Fine Art one because it was very 'open' but had to base it on my Environment, which was fine by me because I was still in "buildings" mode from the previous block of lessons, so rather than do a whole rethink, I just kind of carried on.

The "oil drum" is made from a cardboard box. just cut a big disc and a couple of strips, stuck it all together using a hot glue gun and some gummed parcel tape. When dry I painted it with roughly mixed black, brown and green acrylic paint. I wanted an old rusty look and it's turned out pretty well.

The inside of the drum sides were painted plain black. I left the base free as I knew I would be adding the background later.

LEFT SIDE base.
This was done using a set of blueprints/plans that were found in another studio at college by my lecturer, they were perfect for what I was looking for, so I over sprayed with Bronze Cosmic Shimmer inks.
The Flaring tower is done on some off cuts of greyboard which was painted very dark black/brown and then gone over using Terracotta Alcohol inks again to get a rusty look, this half of the drum is supposed to depict a 'sunset' hence the silhouette. The guy ropes for the tower are done by cutting up some old broken earphones for an MP3 player. The cogs are diecuts and the 'pipes' are Allen keys and an old bike spanner which were coloured using Alcohol inks.

RIGHT SIDE
Sky - Encaustic wax.
Building - This is the main building of Forth Valley College (Falkirk Campus) and was painte3d using Gouache paints, I overstamped the front to give a bit of texture with the Chicken Wire Background Stamp from the Artisitc Stamper, there is actually a kind of 'honeycomb' texture to the front of the building and that stamp worked perfectly!

CENTRE
To hide the join i used the Branches diecuts and turned them into trees, and then stained them with Distress inks.
The 3D roses are done using an image of the college logo which was printed out in different sizes, then stamped on the back using the Clockwork Flowers Stamp from The Artistic Stamper, I coloured the flowers using Distress inks and toned them to match the colours of the painting. There are beautiful cherry blossom trees along the front of the main entrance to college so these roses kind of represent that feature.


FINISHING TOUCHES
I used an old set of stencils for the word "OIL" on the front of the drum, and brought in my meltpot and used Black and Interference Blue UTEE mixed together, and pured it over the side of the drum, just left it to run in whatever direction it wanted.

I am thrilled to bits with the way it has turned out ! My lecturer thinks it's brilliant and thinks it's of a very high standard for an NC student,  His words not mine and a compliment he paid to whole class I may add.

As I said earlier I have been working on this piece for months, not just the end product but also working in my sketchbook too, and, I'm really pleased with the the way it all came together.

Thanks for taking the time out to pop by,

Take care

Jackie xx
Wednesday, 6 March 2013

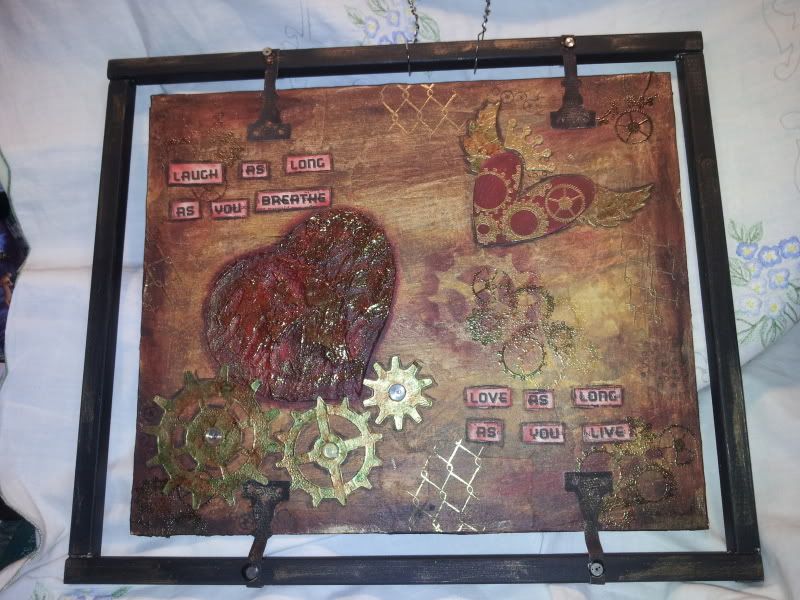
Love ! Steampunk Style !

well, I  managed to squeeze in some more "me" time and did a little crafting for myself. I've had this idea in my head for a while and decided it was time to try and see what I could do with it.

I started off with a canvas board that I had done something else and wasn't happy with so I decided to recycle it. I pasted some torn up newspaper over the base with wallpaper paste. When it was dry I gave the whole thing a coat of Gesso, left it aside overnight to dry then painted over it randomly with acrylic paint , rubbing away some paint with  kitchen roll to let some of the newsprint show through. I also used some die-cut cogs as stencils and dry brushed around them randomly over the background.

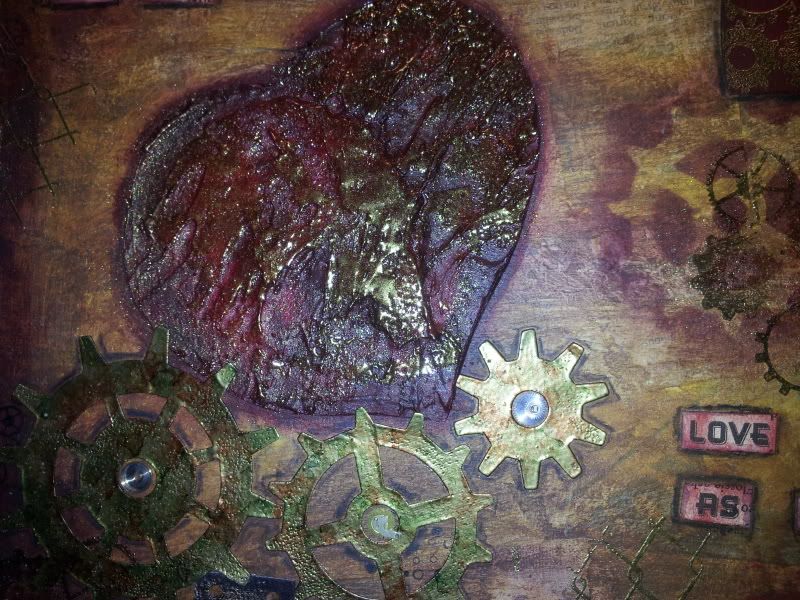
The big heart is textured and done using Pollyfilla mixed with PVA glue instead of water. I drew a big heart shape on a piece of card then cut it out, stuck the "stencil" down with some pritt stick and them spread over the home made texture paste. Lifted off the stencil and then it dry overnight.  I then gessod' over the heart and when dry I painted it rubbing some paint off to try and give it some 'shading'. when dry I embossed with Cosmic Shimmer gold embossing powder.

Here is a close up of the textured heart


The cogs are the Alterations Gadget Gears die which have been embossed with gold embossing powder then gone over with some alcohols inks to give a bit of a rusty look. Did the same with the wings and crown from the Alterations Winged Heart die. The small heart is just painted red, and over stamped and embossed using the Small Cogs stamp from The Artistic Stamper background stamp. I used the same stamp randomly over the background but stamped twice, once with black Archival ink and again in clear versamark which was then embossed with cosmic shimmer gold embossing powder. I also used a chicken wire background stamp and embossed that in gold randomly as well as some small cogs.

The frame is an old slot together tapestry frame which was painted black/brown. I attatched the picture using a  door hinges  die cut from grunge paper and then painted black, I cut off the fancy end and then glued them to the frame, gave them extra support with a drawing pin painted over with black promarker. For hanging I just twisted some wire together. I added some watch parts to the centre of the cogs and also the drawing pins, then dry brushed over some copper colour acrylic paint just to age it a little. The quote is one from Johnny Depp and was printed off onto some old book pages and distressed with Fired Brick distress ink.

Really pleased with the way this has turned out, as I said earlier it was just an idea and I wasn't really sure what I was going to do to attatch it to the frame, but as I was working on it things just seem to fall into place.

Thanks for dropping by and taking the time out to read.

Take care everyone.

Jackie x


Saturday, 9 February 2013

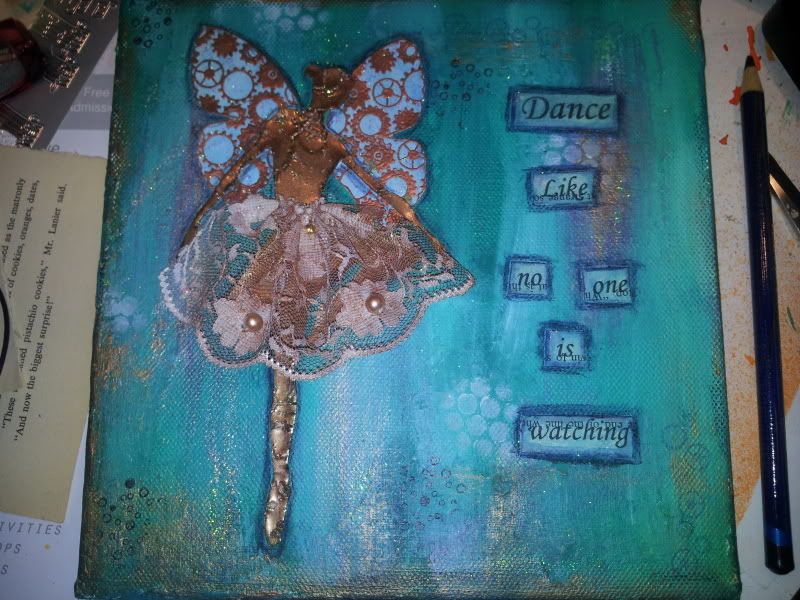
A little 6 x 6 mixed media canvas.

Been having another play with some mixed media stuff today and I am really pleased with the end result for a change!

Started out with an old 6 x 6 canvas that I had done previously and didn't like it , so I  'canibalised' it! Managed to leave some seriously stuck paper to it which was a bonus because it actually gave me a little texture.

Anyway, I gave the whole a going over with some Gesso, when dry, I randomly painted on some acrylic paint, added another colour, some white and a little copper metallic paint.

The 'fairy' is the same as the previous one done in the journal page, a clip art image which was shrunk down. I used versamark clear ink and then heat embossed her in copper, added another coat then stamped into it while still hot with  my favourite crackle background stamp.

Her wings are done using the Tick Tock Butterfly stamp from The Artistic Stamper and stamped using versamark clear and copper embossing powder. Her skirt is a piece of cream beaded lace I had in my stash so I just lightly painted it with copper metallic paint and then when dry I gathered it up  with a few stitches and then stuck it down with a hot glue gun

Printed the phrase off onto some old book pages and coloured them using Denim Distress ink.  Randomly stamped a cogs border and spot border and also used a little sequin waste with some white acrylic paint.  Edged everything off with an Indigo Blue Inktense pencil and then rubbed over some Crystal Stickles!

Really pleased with this piece and I am thinking about entering it into an exhibition being run by the college. Not very often I am confident about my work but this piece has changed that for the time being.

Thanks for reading,

Take care and enjoy the rest of your weekend.

Jackie x