Wednesday 21 December 2011

WOYWW 133 !

Errrm ... what's NOT on it!! lol ! A bit of a 'mess' this week with a few pressies and 'stuff' ready for either finishing or wrapping for Christmas!!

So the housework can wait until I get this lot sorted! I am about as organised as your proverbial in a brewery this year ... THIS year?!! EVERY year is the same ... *sighs* Oh the joys!! ...

Anyway... Why don't you all pop over to the Lovely Mrs D's Stamping Ground and see what everyone else has on thier desks!!

Have fun and Happy WOYWW !


Jackie x

Sunday 18 December 2011

Sunday Stampers week 185!

Over on The Sunday Stampers Challenge there is Blog Candy giveaway! Please pop over for a look :D The theme this week is "Santa Claus".... Well what was I going to do...don't have any Santa stamps at all!! But, I DO have my all time favourite CD Rom by Joanna Sheen called Victorian Christmas! And I LOVE it!! In particular this image!! Isn't he just lovely! Anyway...here's how I made this tag....

It's a plain large Manila tag, I stamped the background with a Christmas text stamp in Brushed Corduroy Distress ink, then distressed the edges with the same and then added a SMIDGEN of Fired Brick just to 'warm it up' a little. I added an Alterations Rosette and a Christmassy embellishment which was from the front of a Christmas cracker!! I just added some ribbons to the loop to finish it off!

Very quick and simple this week.

Thanks for looking in,

Jackie x

Studio 490 Cake Stand part II ...


This one is for my sister in law who is an Art Teacher! I had loads of fun putting this one together! So without further ado here's how it was done....


First of all I painted all the parts with Peeled Paint Distress Stain, then over stamped with the Dots background stamp in Forest Moss Distress ink. Put the whole lot aside to dry then started on the embellishments!


The stamped phrase is again from The Artistic Stamper and is stamped onto cream card in Black Archival ink and then distressed with some Forest Moss distress ink. The 'frame' is a bit of a cheat because I didn't have any to fit that phrase, they were either too small or too large, soooo, I made my own lol! I drew around a Distress Ink pad for the outer frame and for the inner I used the lid!! I cut it out and then proceeded to gild it! The word " ART" is an Alterations die which was distressed and stamped over, then stuck down to the frame and the little girl is the Mabel Lucy Attwell Pen and Ink stamp and is coloured using Promarkers! I stuck that to the side of the frame and then mounted the whole thing on a little 'easel stand!

The pencil is one of those little wooden ones from Ikea lol! It fitted the top of the cake stand perfectly so I gilded it!! Added a vintage pen nib and  an Alterations mini Rosette which was distressed and stamped using the same two shades of green and the Dots stamp!

Here's a close up of the top....


The base was over stamped with The Ink Blots background stamp in Black Archival Ink. I then added an inexpensive little paintbrush which had a plastic handle. I used my wire cutters and cut it to fit the base, I then Gilded it as it was a nasty shade of purple!! I added another vintage pen nib and then a little butterfly to the 'leg' of the stand!!

Here's a close up of the base (apologies for the quality of this picture) ...


So there you have it! I do love these little stands! There are soo many different things you can do with them!! Had a bundle of fun decorating the pencil and paintbrush!! I think my sister in law will enjoy this piece!

So now I'm off for a coffee break and then partake in a Sunday Challenge, I missed it last week!


Take care and thanks for dropping by


Jackie x


Friday 16 December 2011

Studio 490 Cake Stand!

Well what can I say...Saw Hels Demo-ing these on C=C and just HAD to get some! I LOVE these Wendy Vecchi Art Parts !!

This one is the " Cake Stand"! And it's adorable! I got a couple of packets of these because I am going to use them as Christmas gifts! But I have only completed the one at the moment and it's for my mum!


Here's how this was put together... The top and base were coloured with Wild Honey Distress stain, over stamped with the  Dots background stamp from The Artistic Stamper in Fired Brick Distress ink. I also distressed the edges in the same colour to finish it off, put all that aside to dry and then decorated the 'leg' for the stand. Now this is actually a wooden bobbin from a set of five again from The Artistic Stamper.  The tiny little bobbin on the top is from the same pack but this time I gilded it! looks cute too lol!

The flowers were done using The Flower Power Theme Plate  Again using Wild Honey Distress Stain and Fired Brick Distress ink, over stamped with the The Chicken Wire Background  I also used that stamp on the mannequin which is actually an Alterations Die cut, the 'skirt' was made using the leaves from The Tick Tock Flowers  I just added a piece of coloured ribbon and a bow to act as a 'waistban'. The Dragon fly is a peel off stuck to some acetate cut out and then alcohol inked from behind!

On thew base I stuck a die cut bobbin which I distressed, wrapped some ribbon around and then added a couple of  fancy pis! I just added a couple of buttons that I had in my stash just to finish it all off!

Thrilled to bits with the way this has turned out and I seriously hope the others will be as good! I have an 'Art' theme and something for my mother in law...haven't quite figured out what I'm going to do yet so if  I leave hers to last hopefully by then I will have made up my mind! lol.


Thank for dropping by

Take care

Jackie x

Wednesday 14 December 2011

WOYWW !

OOOH Lookie !! :D See what I've got! Some of Lunch Lady Jan's Gorgeous Christmas bunting which I won in her Blog Candy giveaway! It didn't half make me smile I can tell you! Some beautiful fabrics and it will go perfectly in my kitchen which is Morrocan Red! :D I have two big chunky white shelves above the dining table which usually hold my christmas cards but this year will be an exception!! So a HUGE great big THANK YOU to Jan for cheering me up! :D


Anyway....now for my desk...... hmm not really too much going on just now...just a few hand crafted gifts that I'm getting ready for Christmas pressies for the 'girls' in my family ... I am expecting some more 'crafty stuff' to arrive later today so I have a few others to get on with.  This year will be a handcrafted gift for everyone because I'm a wee bit skint!... Dole money doesn't go very far I'm afraid *sighs* Oh how I could really do with a wee job right now...


Right....Just another quick photo to show you then I'm off to get 'sorted'.. lol... Here is a photo of THAT bargain "wee" Christmas tree I mentioned in an earlier post! lol....


Yup! It's THAT big! It nearly touches the ceiling lol....I had to stand on a chair to reach the top of it....must have another look through my deccies for it though because I can't find the star for the top!...anyway...here's a photo of the price tags on the box... I mean I just HAD to show you what I thought was the bargain of the century!! ( the photo isn't sideways the box is)!! So I'm sorry if you all have to try and be contortionists to see it properly lol!!


Right that's me done for the day! Why don't you all pop over to Julia's  and see what's on everyone else crafts Desks!

Have a great WOYWW despite the horrible weather!

Take care

Jackie x

Friday 9 December 2011

Crochet frilly scarf!


Finished off this quick little project last night! There's only five rows to this piece and it's just done using double crochet, trebles and double trebles! REALLY quick and easy thankfully because I only have pretty basic crochet skills to be honest! I have another one of these on the go but it's just a plain purple one this time. Great wee gifts for Christmas! :D


I am STILL feeling pretty miserable and in a lot of pain with this abscess but things are getting a bit better each day! Hopefully I'll be back to normal pretty soon. I would just like to say THANK YOU ALL for your lovely comments and kind wishes, it does mean a lot!

Take care and Happy crafting

Jackie xx

Wednesday 7 December 2011

WOYWW 131

Sorry I'm very late this week :( I have been up most of the night in terrible pain due to a 'dental abscess'!! YUK! Got REALLY strong painkillers to take and I've been so doped up today that I couldn't tell you my ar** from my elbow!! lol...Anyway hopefully Julia over on The Stamping Ground will forgive me for being a little late this week!

I managed to clear my head a little and show you what's sitting on my desk....some bits and pieces of jewellery that I have made waiting for presentation boxes to made for them ... some stamped 'parts' of that 'Girlie notebook' I made and showed earlier, was going to make a few in different colours for stocking fillers but not sure if I will manage now :( and just basically all the bits and pieces that come with the crafting 'thing'!!


Take care everyone

Jackie x

Sunday 4 December 2011

Bright and colourful and "in your face"!!

Yup! I kind of went over board with my 'colours' today! lol    The Sunday Stampers Challenge this week is Love and or Life....Hmmm sounds fairly simeple huh?! Well just read the wee story below and you'll find out! lol!!


I started out with a mega manilla coloured tag and some alcohol inks! Wild Plum, Pink Sherbet, Lemonade and Pearl mixatives, put a few drops onto a non stick craft sheet, spritzed some water then smooshed the tag through!! ... WOW man...pass those sunglasses!! That Wild Plum is sooooo strong!! EEKS!! Sooo to 'tone it down a little' lol... I brushed a very thin layer of white acrylic paint, when that was dry and applied some Faded Jeans, Forest Moss and Wild Honey Distress stains. When that was dry I used my fave crackle background stamp and Faded Jeans distress Ink to 'crackle', then did the same with the Dots  background but only in Forest Moss!

While that was drying I coloured some plain white card  with Wild Honey Distress Ink ans stamped out the  Flower power stamps and the Tick Tock Butterflies .  I over stamped the plain butterfly and the flower with the Dots background stamp using Fired Brick Distress Ink. The leaves were done using Forest Moss and the crackle background stamp and the Steampunk Butterfly and snail were done using Black Archival ink!

The word was stamped using stamps from my stash and I just finished everything off with a bright yellow ribbon coloured with Fired Brick Distress ink.

A very VERY bright piece and to be honest I'm kind of surprised at the way it's turned out! I completely 'freaked' when I saw the colour it was to start with!

Anyway, Take care Everyone and thanks for dropping by,

Jackie x

Saturday 3 December 2011

Girlie Notebook!

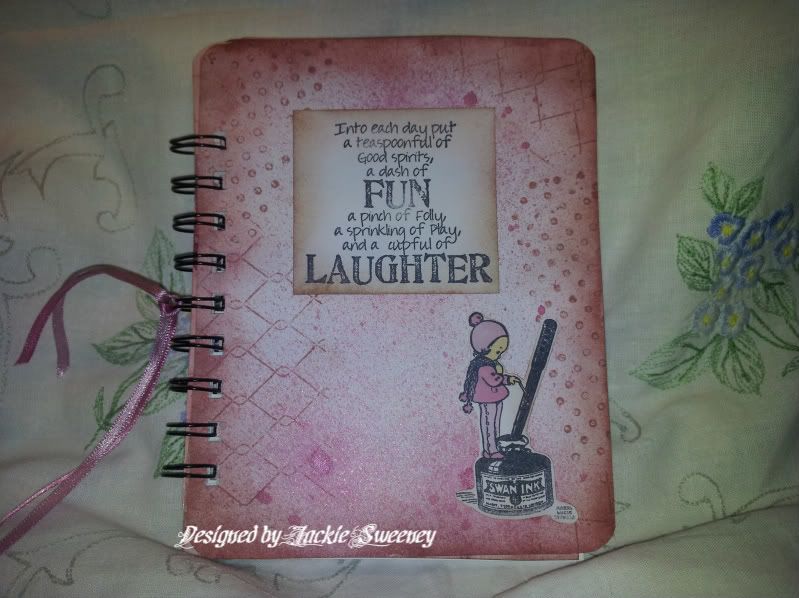
This was just an 'experiment' if you will...and seeing as it's my first attempt at this piece I now know what NOT to do!! lol

For a start off, I think I will use grey board for the covers, I just used ordinary card but it's not quite strong enough and also I'll do more pages but cut them a bit more 'evenly' ! ... *sighs* Still, the next one will be MUCH better!

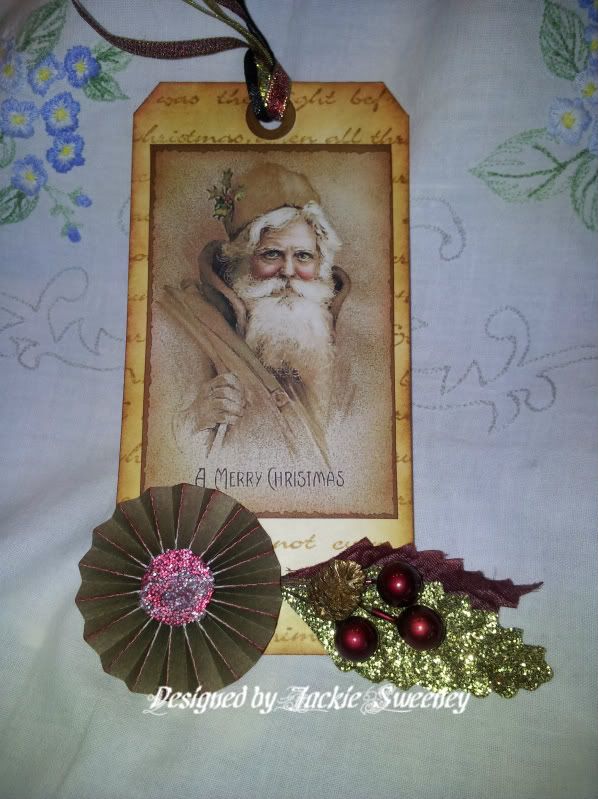
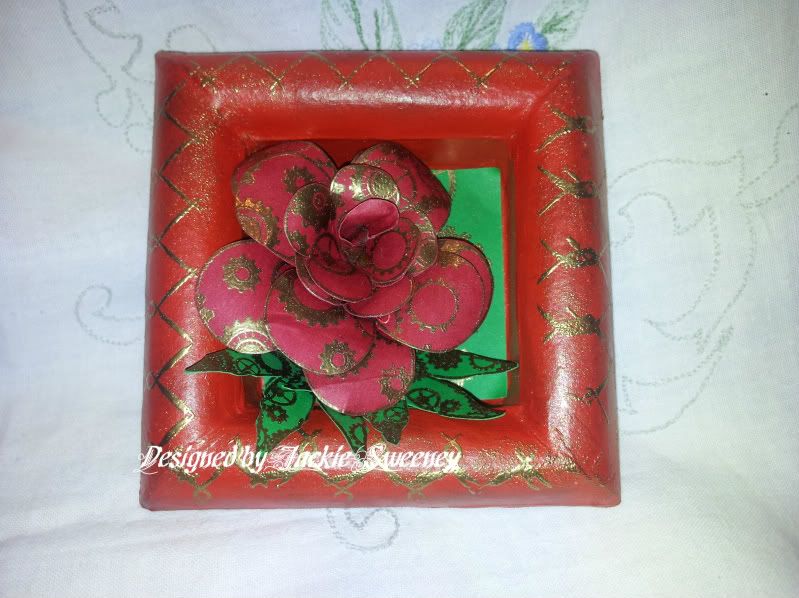
Anyway here's how it was put together....The covers were sprayed with Glimmer Mists Pink Ink. Randomly over stamped with Dots background and the Chicken Wire background in Victorian Velvet Distressed ink.
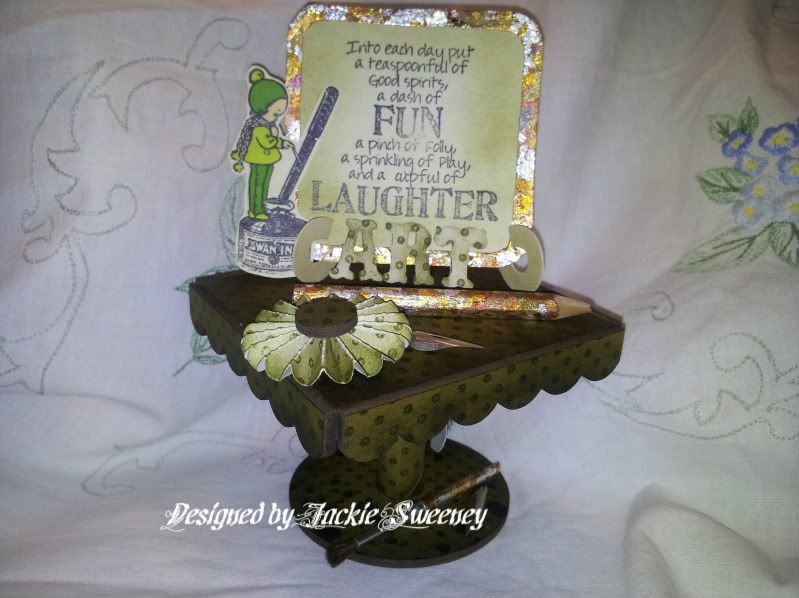
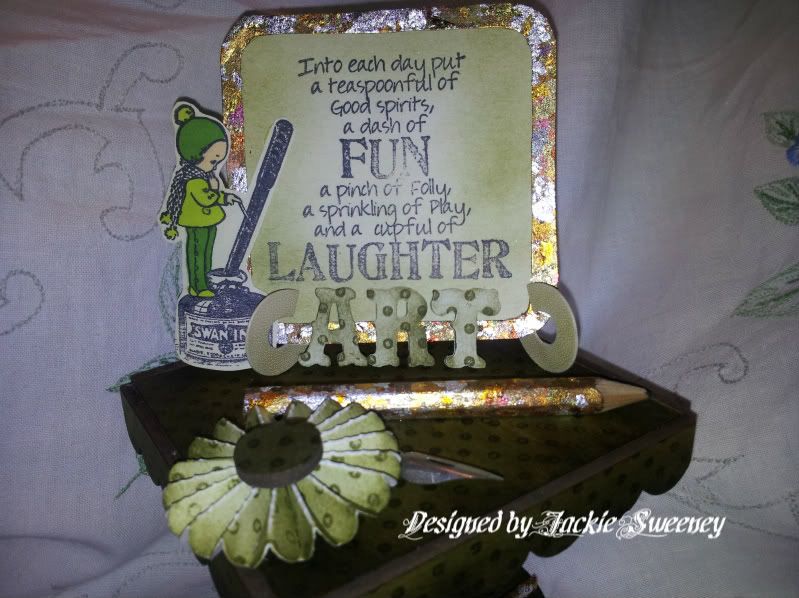
I stamped out the Pen and Ink  stamp from Mabel Lucie Attwell and then coloured it using pro markers! I stamped out the Into Each Day... stamp and then just Distressed that using Victorian Velvet!


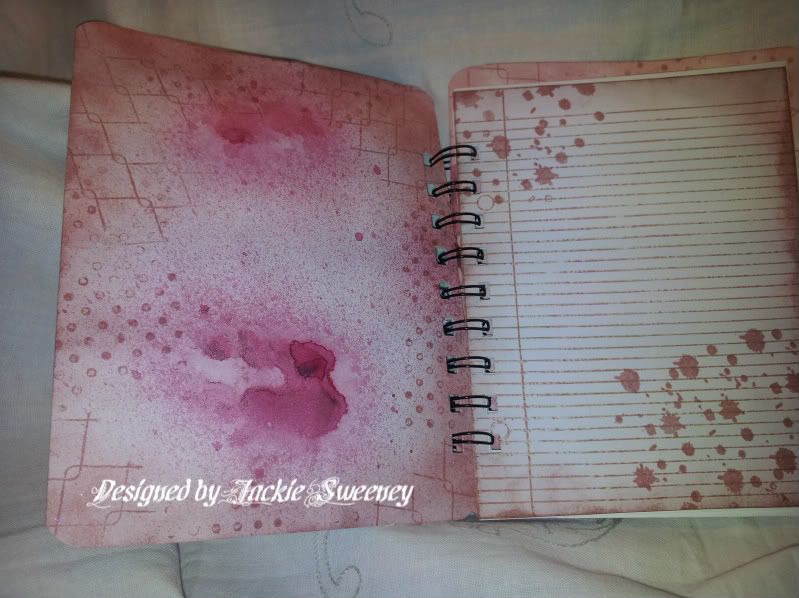
The inside 'pages' were done as follows....

Only one page was stamped because I left the rest plain, not everyone can write mega small!! lol ...

I used the Notebook stamp and stamped it out using Victorian Velvet Distressed Ink, the Ink Blots Background again stamped in the Victorian Velvet, I also distressed the edge of the page! The other pages were SUPPOSED to be cut the same size as the notebook page..... but you know how it is ... lol...

I just bound the whole thing with 1/2 " Bind It All wires and added some ribbon that I coloured using some pro markers!

NOT a brilliant piece of work but as I said, the next one will be better now I know what I'm doing lol!

I do like this idea and I think I will do a few but different colours and maybe make little stocking stuffers with them for Christmas.

Thanks for looking and take care,

Jackie x

Friday 2 December 2011

Steampunk Christmas Rose.

Another decoration for my Christmas tree! In red this time!


As I said in an earlier post, I bought a couple of these frames a few weeks ago. I'd had a pretty good idea what I wanted to do with them and couldn't wait!

This one was painted in Naphthol Red Acrylic paint!! And RED it most certainly was!! EEK! So I 'toned' it down by rubbing on some black Archival ink, it worked although looking at that picture you wouldn't think so lol!!

I used the Chicken Wire background stamp and stamped over the top using Versamark clear ands then did some 'messy' embossing, I wanted a 'dusted' look so I just didn't tap away the excess powder as I normally do when I'm after a cleaner look!

The background is just an off cut of green card stamped with Small cogs and then embossed (cleanly) with gold powder! The Rose is done using the Tick Tock Flowers. You can tell I LOVE this set of stamps can't you! lol.


So there you have it...quite a quick project really and it's turned out very red, very festive and will very good on my tree lol!!

Take care and thanks for dropping by

Jackie x