Wednesday 21 December 2011

WOYWW 133 !

Errrm ... what's NOT on it!! lol ! A bit of a 'mess' this week with a few pressies and 'stuff' ready for either finishing or wrapping for Christmas!!

So the housework can wait until I get this lot sorted! I am about as organised as your proverbial in a brewery this year ... THIS year?!! EVERY year is the same ... *sighs* Oh the joys!! ...

Anyway... Why don't you all pop over to the Lovely Mrs D's Stamping Ground and see what everyone else has on thier desks!!

Have fun and Happy WOYWW !


Jackie x

Sunday 18 December 2011

Sunday Stampers week 185!

Over on The Sunday Stampers Challenge there is Blog Candy giveaway! Please pop over for a look :D The theme this week is "Santa Claus".... Well what was I going to do...don't have any Santa stamps at all!! But, I DO have my all time favourite CD Rom by Joanna Sheen called Victorian Christmas! And I LOVE it!! In particular this image!! Isn't he just lovely! Anyway...here's how I made this tag....

It's a plain large Manila tag, I stamped the background with a Christmas text stamp in Brushed Corduroy Distress ink, then distressed the edges with the same and then added a SMIDGEN of Fired Brick just to 'warm it up' a little. I added an Alterations Rosette and a Christmassy embellishment which was from the front of a Christmas cracker!! I just added some ribbons to the loop to finish it off!

Very quick and simple this week.

Thanks for looking in,

Jackie x

Studio 490 Cake Stand part II ...


This one is for my sister in law who is an Art Teacher! I had loads of fun putting this one together! So without further ado here's how it was done....


First of all I painted all the parts with Peeled Paint Distress Stain, then over stamped with the Dots background stamp in Forest Moss Distress ink. Put the whole lot aside to dry then started on the embellishments!


The stamped phrase is again from The Artistic Stamper and is stamped onto cream card in Black Archival ink and then distressed with some Forest Moss distress ink. The 'frame' is a bit of a cheat because I didn't have any to fit that phrase, they were either too small or too large, soooo, I made my own lol! I drew around a Distress Ink pad for the outer frame and for the inner I used the lid!! I cut it out and then proceeded to gild it! The word " ART" is an Alterations die which was distressed and stamped over, then stuck down to the frame and the little girl is the Mabel Lucy Attwell Pen and Ink stamp and is coloured using Promarkers! I stuck that to the side of the frame and then mounted the whole thing on a little 'easel stand!

The pencil is one of those little wooden ones from Ikea lol! It fitted the top of the cake stand perfectly so I gilded it!! Added a vintage pen nib and  an Alterations mini Rosette which was distressed and stamped using the same two shades of green and the Dots stamp!

Here's a close up of the top....


The base was over stamped with The Ink Blots background stamp in Black Archival Ink. I then added an inexpensive little paintbrush which had a plastic handle. I used my wire cutters and cut it to fit the base, I then Gilded it as it was a nasty shade of purple!! I added another vintage pen nib and then a little butterfly to the 'leg' of the stand!!

Here's a close up of the base (apologies for the quality of this picture) ...


So there you have it! I do love these little stands! There are soo many different things you can do with them!! Had a bundle of fun decorating the pencil and paintbrush!! I think my sister in law will enjoy this piece!

So now I'm off for a coffee break and then partake in a Sunday Challenge, I missed it last week!


Take care and thanks for dropping by


Jackie x


Friday 16 December 2011

Studio 490 Cake Stand!

Well what can I say...Saw Hels Demo-ing these on C=C and just HAD to get some! I LOVE these Wendy Vecchi Art Parts !!

This one is the " Cake Stand"! And it's adorable! I got a couple of packets of these because I am going to use them as Christmas gifts! But I have only completed the one at the moment and it's for my mum!


Here's how this was put together... The top and base were coloured with Wild Honey Distress stain, over stamped with the  Dots background stamp from The Artistic Stamper in Fired Brick Distress ink. I also distressed the edges in the same colour to finish it off, put all that aside to dry and then decorated the 'leg' for the stand. Now this is actually a wooden bobbin from a set of five again from The Artistic Stamper.  The tiny little bobbin on the top is from the same pack but this time I gilded it! looks cute too lol!

The flowers were done using The Flower Power Theme Plate  Again using Wild Honey Distress Stain and Fired Brick Distress ink, over stamped with the The Chicken Wire Background  I also used that stamp on the mannequin which is actually an Alterations Die cut, the 'skirt' was made using the leaves from The Tick Tock Flowers  I just added a piece of coloured ribbon and a bow to act as a 'waistban'. The Dragon fly is a peel off stuck to some acetate cut out and then alcohol inked from behind!

On thew base I stuck a die cut bobbin which I distressed, wrapped some ribbon around and then added a couple of  fancy pis! I just added a couple of buttons that I had in my stash just to finish it all off!

Thrilled to bits with the way this has turned out and I seriously hope the others will be as good! I have an 'Art' theme and something for my mother in law...haven't quite figured out what I'm going to do yet so if  I leave hers to last hopefully by then I will have made up my mind! lol.


Thank for dropping by

Take care

Jackie x

Wednesday 14 December 2011

WOYWW !

OOOH Lookie !! :D See what I've got! Some of Lunch Lady Jan's Gorgeous Christmas bunting which I won in her Blog Candy giveaway! It didn't half make me smile I can tell you! Some beautiful fabrics and it will go perfectly in my kitchen which is Morrocan Red! :D I have two big chunky white shelves above the dining table which usually hold my christmas cards but this year will be an exception!! So a HUGE great big THANK YOU to Jan for cheering me up! :D


Anyway....now for my desk...... hmm not really too much going on just now...just a few hand crafted gifts that I'm getting ready for Christmas pressies for the 'girls' in my family ... I am expecting some more 'crafty stuff' to arrive later today so I have a few others to get on with.  This year will be a handcrafted gift for everyone because I'm a wee bit skint!... Dole money doesn't go very far I'm afraid *sighs* Oh how I could really do with a wee job right now...


Right....Just another quick photo to show you then I'm off to get 'sorted'.. lol... Here is a photo of THAT bargain "wee" Christmas tree I mentioned in an earlier post! lol....


Yup! It's THAT big! It nearly touches the ceiling lol....I had to stand on a chair to reach the top of it....must have another look through my deccies for it though because I can't find the star for the top!...anyway...here's a photo of the price tags on the box... I mean I just HAD to show you what I thought was the bargain of the century!! ( the photo isn't sideways the box is)!! So I'm sorry if you all have to try and be contortionists to see it properly lol!!


Right that's me done for the day! Why don't you all pop over to Julia's  and see what's on everyone else crafts Desks!

Have a great WOYWW despite the horrible weather!

Take care

Jackie x

Friday 9 December 2011

Crochet frilly scarf!


Finished off this quick little project last night! There's only five rows to this piece and it's just done using double crochet, trebles and double trebles! REALLY quick and easy thankfully because I only have pretty basic crochet skills to be honest! I have another one of these on the go but it's just a plain purple one this time. Great wee gifts for Christmas! :D


I am STILL feeling pretty miserable and in a lot of pain with this abscess but things are getting a bit better each day! Hopefully I'll be back to normal pretty soon. I would just like to say THANK YOU ALL for your lovely comments and kind wishes, it does mean a lot!

Take care and Happy crafting

Jackie xx

Wednesday 7 December 2011

WOYWW 131

Sorry I'm very late this week :( I have been up most of the night in terrible pain due to a 'dental abscess'!! YUK! Got REALLY strong painkillers to take and I've been so doped up today that I couldn't tell you my ar** from my elbow!! lol...Anyway hopefully Julia over on The Stamping Ground will forgive me for being a little late this week!

I managed to clear my head a little and show you what's sitting on my desk....some bits and pieces of jewellery that I have made waiting for presentation boxes to made for them ... some stamped 'parts' of that 'Girlie notebook' I made and showed earlier, was going to make a few in different colours for stocking fillers but not sure if I will manage now :( and just basically all the bits and pieces that come with the crafting 'thing'!!


Take care everyone

Jackie x

Sunday 4 December 2011

Bright and colourful and "in your face"!!

Yup! I kind of went over board with my 'colours' today! lol    The Sunday Stampers Challenge this week is Love and or Life....Hmmm sounds fairly simeple huh?! Well just read the wee story below and you'll find out! lol!!


I started out with a mega manilla coloured tag and some alcohol inks! Wild Plum, Pink Sherbet, Lemonade and Pearl mixatives, put a few drops onto a non stick craft sheet, spritzed some water then smooshed the tag through!! ... WOW man...pass those sunglasses!! That Wild Plum is sooooo strong!! EEKS!! Sooo to 'tone it down a little' lol... I brushed a very thin layer of white acrylic paint, when that was dry and applied some Faded Jeans, Forest Moss and Wild Honey Distress stains. When that was dry I used my fave crackle background stamp and Faded Jeans distress Ink to 'crackle', then did the same with the Dots  background but only in Forest Moss!

While that was drying I coloured some plain white card  with Wild Honey Distress Ink ans stamped out the  Flower power stamps and the Tick Tock Butterflies .  I over stamped the plain butterfly and the flower with the Dots background stamp using Fired Brick Distress Ink. The leaves were done using Forest Moss and the crackle background stamp and the Steampunk Butterfly and snail were done using Black Archival ink!

The word was stamped using stamps from my stash and I just finished everything off with a bright yellow ribbon coloured with Fired Brick Distress ink.

A very VERY bright piece and to be honest I'm kind of surprised at the way it's turned out! I completely 'freaked' when I saw the colour it was to start with!

Anyway, Take care Everyone and thanks for dropping by,

Jackie x

Saturday 3 December 2011

Girlie Notebook!

This was just an 'experiment' if you will...and seeing as it's my first attempt at this piece I now know what NOT to do!! lol

For a start off, I think I will use grey board for the covers, I just used ordinary card but it's not quite strong enough and also I'll do more pages but cut them a bit more 'evenly' ! ... *sighs* Still, the next one will be MUCH better!

Anyway here's how it was put together....The covers were sprayed with Glimmer Mists Pink Ink. Randomly over stamped with Dots background and the Chicken Wire background in Victorian Velvet Distressed ink.

I stamped out the Pen and Ink  stamp from Mabel Lucie Attwell and then coloured it using pro markers! I stamped out the Into Each Day... stamp and then just Distressed that using Victorian Velvet!


The inside 'pages' were done as follows....

Only one page was stamped because I left the rest plain, not everyone can write mega small!! lol ...

I used the Notebook stamp and stamped it out using Victorian Velvet Distressed Ink, the Ink Blots Background again stamped in the Victorian Velvet, I also distressed the edge of the page! The other pages were SUPPOSED to be cut the same size as the notebook page..... but you know how it is ... lol...

I just bound the whole thing with 1/2 " Bind It All wires and added some ribbon that I coloured using some pro markers!

NOT a brilliant piece of work but as I said, the next one will be better now I know what I'm doing lol!

I do like this idea and I think I will do a few but different colours and maybe make little stocking stuffers with them for Christmas.

Thanks for looking and take care,

Jackie x

Friday 2 December 2011

Steampunk Christmas Rose.

Another decoration for my Christmas tree! In red this time!


As I said in an earlier post, I bought a couple of these frames a few weeks ago. I'd had a pretty good idea what I wanted to do with them and couldn't wait!

This one was painted in Naphthol Red Acrylic paint!! And RED it most certainly was!! EEK! So I 'toned' it down by rubbing on some black Archival ink, it worked although looking at that picture you wouldn't think so lol!!

I used the Chicken Wire background stamp and stamped over the top using Versamark clear ands then did some 'messy' embossing, I wanted a 'dusted' look so I just didn't tap away the excess powder as I normally do when I'm after a cleaner look!

The background is just an off cut of green card stamped with Small cogs and then embossed (cleanly) with gold powder! The Rose is done using the Tick Tock Flowers. You can tell I LOVE this set of stamps can't you! lol.


So there you have it...quite a quick project really and it's turned out very red, very festive and will very good on my tree lol!!

Take care and thanks for dropping by

Jackie x

Wednesday 30 November 2011

WOYWW!!

** feels forehead to check for a fever ** !! ..... lol


Yep!! I've had a 'mild' tidy up!! I needed to really because it was getting beyond a joke! That 'stuff' you see on my desk is just a 'worksheet' !! It's actually the instructions on how to fit all those kitchen units together! But because it's shiny I tend to use it for my 'blending'!! The next tidy up task will be that box in the background! It's stuffed full of...well... stuff!! lol.............


Now....I've had a fair few comments on the black thing in the corner holding my scissors......I call it my 'lazy Susan' but that's only because I just can't remember the name of the dang thing! I've had it for absolute yonks! I can't even remember where I bought it from .... It is a handy beastie though, it rotates which gives you access to all those little plastic tubs, which holds anything you would like to put in them....I use it for gems, buttons...etc...blah blah blah!! So for those of you who were asking I do apologise on not being of more help!

Why don't you all pop over to  Julia's Stamping Ground and have a wee nosey around other people's craft spaces and join in the fun!


I have a busy day ahead so posting this at silly o'clock in the morning. I have a few appointments to attend today one of them being the hairdressers! :) Nothing like a nice hairdo to make you feel a bit better.

So take care everyone and Happy WOYWW

Jackie x

Sunday 27 November 2011

Christmas tree decoration!

I bought these adorable little Papier Mache frames from The Artistic Stamper and couldn't wait to get playing!! This is the 'deep' one , it's 10cm square and just the perfect size!

I started off by painting the whole thing in gold acrylic metallic paint! When that was dry I mixed up some green and black acrylic paint and then painted over the whole thing again! When that was dry I used the Dots Background and then stamped and embossed in clear! I then mixed a paler shade of green and painted over the whole thing again! When it completely dry I then gave it rub with a rough cloth to remove some of the paint from the embossing, because the cloth was very rough I managed to bring through some of the original gold that I first started with! I love this rough and distressed look, gives it a bit of an olde worlde feel!

I had an off cut of sheet music in my stash so coloured that with glimmer mists and then stuck it into the bottom of the frame. I gave the whole thing a spritz with some gold spray ink. I added some sequin stars to the background and then used a hot glue gun to stick down that fancy embellishment which believe it or not came from the front of a Christmas cracker!!! lol.

I really am pleased with this piece! LOVE the way it's turned out and I think it will look great on my tree! And yes... it IS a biiiiiig tree...I got it in a sale last year at a DIY store! It's a 7 foot pre-lit tree and was selling for £199.95....it was reduced to...................wait for it................. a TENNER !!!! Bargain or what?!! :D
So that's why I think these will be great for my 'wee tree'! lol

Take care and thanks for dropping by

Jackie x

Sunday Stampers 182 " Stars "

Good afternoon everyone! Well it's certainly the weather for crafting! The weather we had in Central Scotland was atrocious! Very VERY windy and terrifyingly so!

Anyway I digress......over on The Sunday Stampers this week's challenge is " Stars " ! Hmmm not something I really do a lot of or have a lot of for that matter...sooo here's what I came up with this time!


Nothing absolutely spectacular really! It's the Sizzix Bigz Nesting Star ! I've had that die for yonks and just got round to using it today! It's actually alternating green and gold mirri card but sadly the photo doesn't show it very well! I was a tad fiddly stringing it together with nylon thread but I got there in the end! I may just do dome more of these for my tree this year! I really fancy the 'handcrafted' look! I always try and have a different theme each year! I'll see how my time goes and then decide !

Take care everyone and hope your weather has improved a little!

Jackie x

Saturday 26 November 2011

CD Mini memory album!


Finished off this piece late last night - this morning for my mum for her birthday next week!


It's a mini memory album made from old Cd's! I covered them in lovely patterned papers from my craft stash and just made up some fun 'pages'!

The COVER is done using some Laura Ashley papers and some sizzlet die cuts that I had in my craft stash!

Here's a few close ups of some of the pages...


The 'photo frame' is actually done using the Eazi-Score Mandala Reflections board ( a great wee cheat if you don't have any nesties!)..just finished it off using a gold marker. The other page is done using the Alterations Winged Heart die, a phrase that I printed off on the computer and a playing card that I Alcohol inked and distressed!


Left page - is a Movers and Shapers Baroque label with a keyhole punched into it, I printed off the phrase on the computer first then ran the whole thing through the big shot! Sprayed and distressed it a little and then added a key!

Right page - is some stampboard! Coloured the background, stamped the rose script, coloured using inktense pencils then triple embossed over the top! I added a chipboard alphabet which I coloured and finished off with a fancy flower.


These two were fairly simple - left page is done using the Reflections score board again, framing a phrase that I printed off, I just added a flower to embellish.

Right page is again the Reflections board. Only this time I sprayed the blue card with some fireworks interference blue ink and finished off  with a silver marker.

It's a nice wee project and came out a wee bit better than I thought it would!

My mum will love it! :)

Thanks for dropping by

Take care and Happy Crafting

Jackie x


Jackie x

Wednesday 23 November 2011

WOYWW 129

Well, cant believe it's wednesday again! Where has my week gone! Been extremely busy finishing off my art portfolio covers, trying to fight off this stinking cold that my teenager kindly shared with me, which means I can't visit my mother in law at the hospital just now.... :(

I have LOADS of crafting 'stuff' to catch up on as well...so looks like any house work I had planned can wait!!!

Anyway over at Julia's you can have a nosy around everyone else's work desks and see if there's are any tidier than mine! I'll bet they are too !! lol


On my desk today is a commission I've just started on! Yup! It's a box shaped like the Tardis from Dr Who ...! God my big buddy REALLY knows how to set a challenge! Also some new backgrounds stamps and to the left of that is all the stuff I moved out of the way to give me more space to work !!!! lol....

Anyway, I'm off for now, got a fair bit of stuff to be getting on with.

Take care all and Happy WOYWW!

Jackie x

Tuesday 22 November 2011

Art portfolio cover finally finished!

YAY! I have FINALLY finished the covers for my art portfolio!! Soooo pleased to get it all done ! Not really sure if I'm pleased with it or not now because as this is my first attempt there are several things I should have and could have done differently! Still , it's turned out not too bad and I DID enjoy playing around with some new techniques and thought it was a great way to practice!

So without further ado....here's the FRONT cover... (click on the photos to enlarge)


INSIDE FRONT cover....


INSIDE BACK cover...


and the BACK cover..
.

Now it's not brilliant but it WAS my first attempt at something so big (A3) size and I did enjoy just letting my mind 'wander'!

Nothing majorly difficult in the way it was put together really, just painted some grey board with cheap white acrylic paint and then decorated the backgrounds with a mixture of Glimmer Mist spray inks, Alcohol Inks, Distress Inks, some stamping and Die cuts! Lots and lots of different 'layers' colours, techniques and textures as well.

I will keep the pages loose until I get called up for an interview, because I would like to keep adding as much as I can to it, I don't want to put it all together just now only to take it apart again to add something else....

Thanks for looking in,

Take care

Jackie x

Sunday 20 November 2011

Sunday Stampers week 181 Snowmen!!

This weeks Sunday Stampers Challenge over here is a real fun one this week! Snowmen!! :) Oh and there's a *giveaway* as well so please pop over for a look see!


Anyway , I did yet another tag lol...going to have a nice wee book with all these tags I've done and it's certainly going to be interesting, which was what I was hoping for!

Anyway...I Stamped and embossed the Dots Background stamp From The Artistic Stamper, in clear embossing powder then inked the tag using Faded Jeans Distress Stains!

~The snowman is the Original Red Sizzix die and was cut from some embossed 'Christmas' design card. I coloured the hat, scarf and 'arms' using pro-markers, then distressed the snowman with Faded Jeans Distress ink! This brought up the embossing on the card which sadly doesn't show up too well in the photo but you can just see it! I added some little Christmas embellishments, and some gems for his eyes and buttons and finished off with some coloured ribbons.

I think he's rather cute actually :) !!

Thanks for looking in and take care everyone,

Jackie xx

Saturday 19 November 2011

no crafting...

...to show at the moment :(  NOT having a very good week this week I'm afraid.

I did manage those sweet wee wooden birdies and have also managed to do the inside back cover of my Art portfolio, I only have the inside front to do and that's it finished! At last! yay!

My Mother-in-law is in the hospital at the moment so things are a wee bit 'all over the place' just now!  Just trying to 'juggle' too many things at once and failing abysmally!

Never mind, she's doing fine but because she's nearly 90 they just want to keep an eye on her and make sure she's OK.

So with a wee bit of luck I can get some crafting done today and clear my head a little!

Take care everyone and once again sorry for the lack of blogging and challenges this week.

Jackie x


Wednesday 16 November 2011

Steampunk Christmas Tree Decorations!

Love love LOVE these   wee wooden birdies !! I painted them with Acrylic paint in Eggplant! Then when dry I sprayed them with some Glimmer Mists to give them a wee bit of a sheen. I then over stamped with the Chicken wire background and Dots background stamps then heat embossed in gold embossing powder. The 'feathers' are actually the leaves from the Tick Tock Flowers theme plate ! With those I just sprayed some lilac coloured paper with Glimmer mists, stamped out and embossed the leaves and then cut them out!

The cogs are the small cogs from the Alterations Gadget Gears die! Those were sprayed with Glimmer mists and over stamped using the small flower from the Tick Tock Flowers theme plate! I just attatched them to the loop on the bottom or the ornament with a jump ring!

Here's a close up of one of the birds so you can have a better look....click on the photo to enlarge...

I'm thrilled to bits with the way these have turned out and you can bet your life I'll be doing more!

Thanks for looking in

Take care and Happy Crafting

Jackie x


WOYWW 128


Hmmmph! Wednesday again...and as you can see there's not a lot going on! I've been partaking in lots of shenanigans since last Thursday, had a house full of visitors the last of which left on Monday, spent the rest of that day just vegetating and sleeping lol, Yesterday was spent catching up on some household stuff, and hopefully today I'll be able to do SOME crafting! Although not really very sure about that at the moment! You see my teenager thought he's be a nice teenager for a change and decided to share his stinking cold with me! Bleh ...is all I can say to the way I'm feeling just now! Still, it could be worse I suppose, nothing a hot Beechams won't help with!

Anyway....That pile of  'stuff' is for my art portfolio, so hopefully I can get some more work done on it today and get the thing finished! It is taking a wee bit longer than I'd liked but I want to get it as good as I can! Sooo if you pop over to Julia's Stamping Ground you can have a nosey at what's on everyone else's desks!


Right...that's enough waffling on from me...have a happy WOYWW !!

Take care

Jackie xx

Wednesday 9 November 2011

WOYWW 127

Oh My!! Wednesday already! Where has the week gone! Anyway here's what's on my workdesk this week!


It IS a little tidier than the last time you saw it! I had to! lol....that piece you see there is an A3 sized Portfolio cover so I needed the space!! lol

That was the SECOND attempt because the first one didn't turn out quite the way I wanted so I will use that for the back cover! 

Anyway here's a picture of the nearly finished piece, (click the photo to enlarge if you want a better look)...


  I just have to decorate the insides then add the pages, but that will have to wait until sunday/monday I'm afraid, because I have a rahter busy 'weekend' starting tonight lol! Got visitors coming! I have one from Royston Herts arriving tonight, one from Birmingham tomorrow, then one from Up North in Scotland on friday and saturday! And all for the sake of a couple of rock concerts! Going to be a tad mental and I'm quite looking forward to all the pandemonium and chaos!


Anyway I digress....lots.... please pop over to Juila's for a nosey around everyon else's crafty spaces!

Have fun and have a great weekend!

Jackie x

Sunday 6 November 2011

Sunday Stamper week 179 !

Well it's Sunday and that means it's for the  Sunday Stampers Challenge !! And the Theme this week is Christmas!


YET ANOTHER tag.... lol....This time I thought I'd do something completely different and went for a 'Steampunk' Christmas!

A plain whit tag roughly coloured with Wild Honey Distress Stain, I then double stamped the leaves from Tick Tock Flowers Themeplate and heat embossed with gold powder! I Distressed the edges using Fired Brick and Forest Moss then added the red ribbon at the top with some tiny gold brads.

I roughly coloured some white card with Wild Honey Distress Stain and then stamped out The Inspirational Lightbulbs . I clear embossed over the 'cogs' one and put it aside. The 'plain' one was overstamped in Fired Brick Distress ink and a crackle background stamp, then clear em,bossed and then stamped into again with the crackle stamp! The numbers are actually stamped in Green but sadly the green doesn't really show up in this photo and thew whole thing looks very 'yellow/orange'!

Anyway, it was supposed to look like Christmas tree lights hanging from the tree....??.....Never mind...we learn each day by having fun practicing!


Thanks for looking in

Jackie xx

Art Portfolio

Good Afternoon blogland! Sorry I've been a bit AWOL for the past few days, but I've been working on my Art portfolio! It's a bit bigger than I would have liked and so it took me a tad longer!

Anyway, here is what I have done so far! Now I'm not too sure whether I'll use this for the front or the back because I'm not very happy with the placement of the letters!

I do love the way this has turned out and I think I pleasantly surprised myself with this piece despite the letters being squint! lol

Anyway It started out as a HUGE sheet of greyboard, which I just cut in half and got an A3 size! (or slightly bigger)! I painted the whole thing with cheap plain white acrylic paint then set aside to dry.

When dry, I just smooshed some different colours randomly over the background, added matching Glimmer Mists, some Alcohol ink drips, spritzed with water then heat dried,  Did some faux resist stamping, then over stamped with various background stamps in my stash! The big circles are done using a coffee jar lid! lol...Scribbled round the letters with a black marker and a white writer, then just added a few words here and there along with the big scroll. The letters were done using the Eazi-Score alphabet templates, run through the Big Shot with some texture embossing folders and then coloured and distressed!

Here's a couple of close ups of various pieces from the whole thing...


As I said earlier, I'm, not sure if I will use this as the front or back cover yet, I'll work on the other piece and see how that goes! Artist portfolios are quite expensive so I thought I'd have a go at trying to make my own! Don't know how well it will go down but all we can do is wait and see!

Thanks for looking

Take care and enjoy the rest of your day

Jackie x


Wednesday 2 November 2011

Last page from my little 'Inspiration' book!

This one is a "Time" themed page and I'll think I'll enter this for a challenge, over on The Artistic Stamper Creative Team Blog because I'm really pleased with the way this has turned out!

I ran Tim Holtz backing paper through the big shot with an On The Edge Tab die, then ran it through again with the Gearwheels Embossing folder. I roughly coloured the background with Wild Honey Distress Stain ( I do love this colour)! I Distressed the edges and the gearwheels with Brushed Corduroy and Fired Brick Distress Ink. I then stamped the pocket watch stamp in clear Versamark and then heat embossed with clear embossing powder!

I I die cut the Alterations Weathered Clock, distressed it with Wild Honey and Fired Brick then stuck part of it down onto the page. The wings are from the Alterations Winged Heart die which were distressed using Faded Jeans then over stamped with a crackle back ground stamp in Black Archival Ink! I stamped out a Different pocket watch from the same themeplate, distressed it in matching colours and then heat embossed the 'face' with clear embossing powder.  The phrase is also from the same themeplate and was stamped using Fired Brick Distress ink!!

I have just really started 'doing' backgrounds so it's not as good as I would have liked but once I get more 'stuff' to help me the better they will become! :D  (I hope) lol

Thanks for looking in

Take care

Jackie x


WOYWW 126 !

Oh Dear.....lol....5 feet of work desk and I'm down to about 6 inches of space!! lol.....*sighs*...

Anyway... A pile of my craft 'haul' from last week! Some stamps from The Artistic Stamper, Some Alterations dies and embossing folder and some Distress Stains (the dies and stuff were bought when I was at the SECC last weekend)! The 'last' page of my little inspirations book which I'm hoping to finish off today! A 6 x 6 Canvas collage and underneath that is a huge print out of a brief for a commission I NEED to start on today if I can!

So blogland, why not join in the fun over on Julia's and show off your "creative spaces"!


TTFN and have a nice day


Jackie x


Sunday 30 October 2011

Sunday Stampers week 178

The Theme this week over on The Sunday Stampers Challenge is Halloween/Bats!

And trust me! This WAS a challenge for me, because, I have nothing remotely Halloween-ie in my craft stash AT ALL!! Simply because I am on such a tight budget that I tend to buy products I can use all year round rather than just once a year, if you get my meaning.

Anyway - to the tag....

A plain white tag distressed with, Wild Honey, Dried Marigold, Fired Brick and Forest Moss. I over stamped the background with a crackle background stamp using Brushed Corduroy Distress Ink.  The bats came courtesy of google lol I printed them off, cut a couple of them out and then stamped over them with the crackle background stamp and clear embossed over that!  The tree is the decorative strip Birds and Branches die, I just cut some of the branches back and cut the leaves off!  I then Distressed around the edge of the tag using Black Memento and a bit of a kitchen sponge, I don't have any proper Black Distress ink I'm afraid, so I kind of had to improvise a little! lol

I added some ribbon which was white, coloured it with an Orange Pro Marker and a Black Pro marker! 

 Improvisation seems to have been the whole story with this tag really but it's turned out ok considering!

Thanks for looking in,

Happy Stamping

Jackie x

Friday 28 October 2011

Quick Birthday Card!


Good Evening blogland! I've actually made a card!! My first card in aaaaaaaaaages!! Quite pleased with the way this has turned out actually.

It's a Birthday Card for Cameron's Gran so I wanted to keep it fairly clean and simple!

I very lightly distressed  base cream coloured card with Wild Honey and Dried Marigold distress inks, distressed the small mat with the same colour only heavier, then stamped out the phrase which is from The Artistic Stamper in Versafine Vintage sepia.

I stamped the jars  which are again from The Artistic Stamper in the Vintage sepia and very lightly distressed them with the Wild Honey and Dried Marigold, I also used a little Forest Moss , I was trying for the 'old green glass' look...it turned out not too bad actually. I just added some Flora Doodles silk flowers and the middle one is just paper, coloured and embossed with clear embossing powder to give it a shine!

Really pleased with the way this has turned out because it's my first card in a long while, I've been to busy doing books and altering 'stuff' lol!!

Thanks for looking in

Have a lovely evening and a great weekend! I'm off to the SECC in Glasgow tomorrow! :D

Jackie x

Thursday 27 October 2011

A Screw loose??......

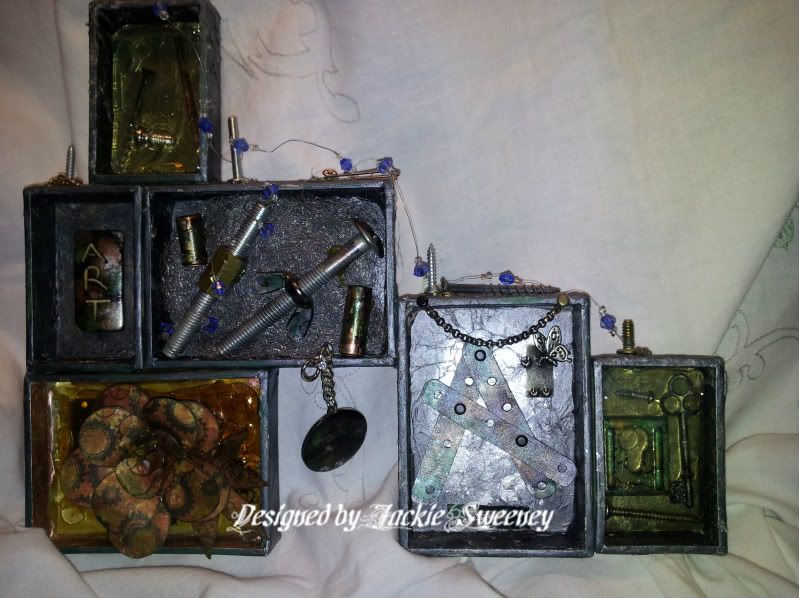
Toolbox trash + Tabletop scraps + spare configurations boxes = ....


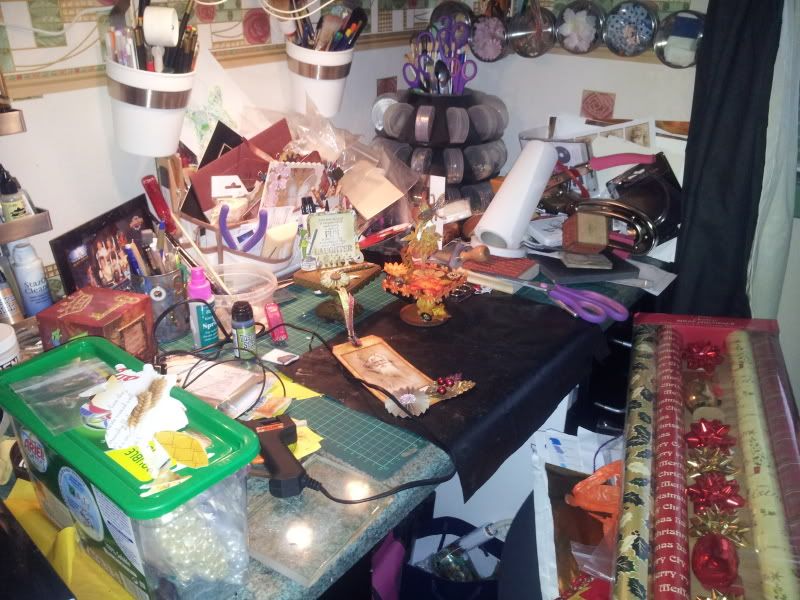
These were the boxes left over from my print tray project! Now please excuse the quality of the photo but this piece was a bit difficult to capture!


First of all I found what way I wanted the boxes, stuck them all together and then covered them with torn, crinkled and creased white tissue paper! I painted over the whole thing with Black Metallic acrylic paint and then set aside to dry,

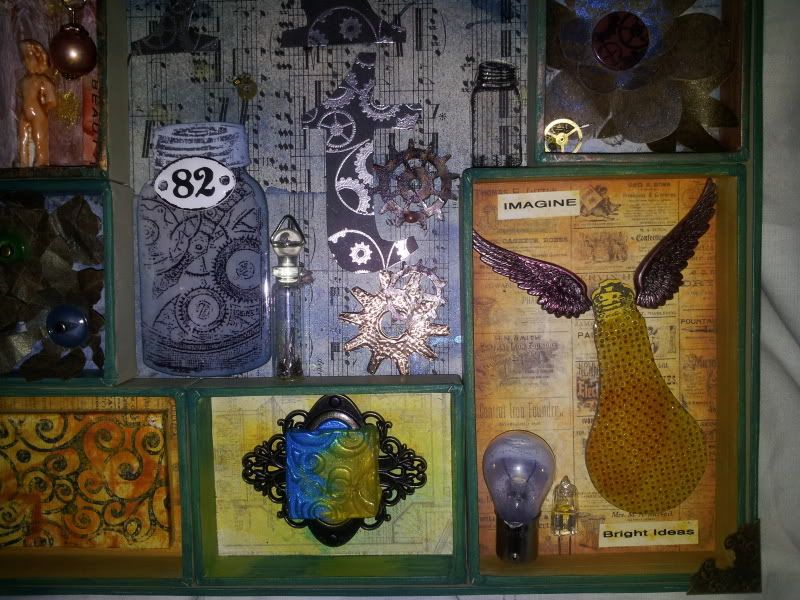
The boxes and contents -

Small top box - A UTEE piece and a bit difficult to see the 'contents' - An alan key which is alcohol inked, screws, nails, a safety pin, a paper clip and a little odd shaped wire connector thingie!

Second row left to right -

small box is a simple piece, just a bamboo domino alcohol inked and using a promarker blender pen for the writing!

Large box - background of wire wool! A couple of big nuts and bolts and some off cuts of copper pipe which I alcohol inked!

Bottom row left to right -
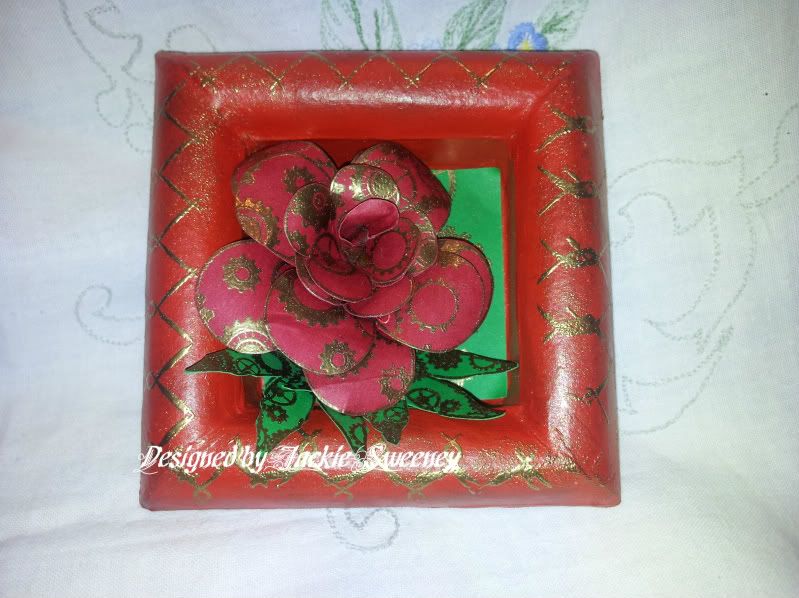
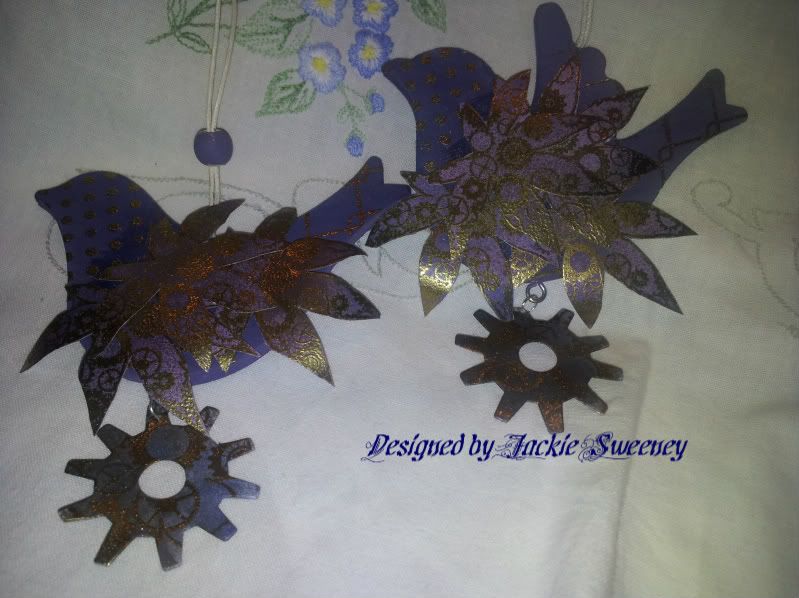
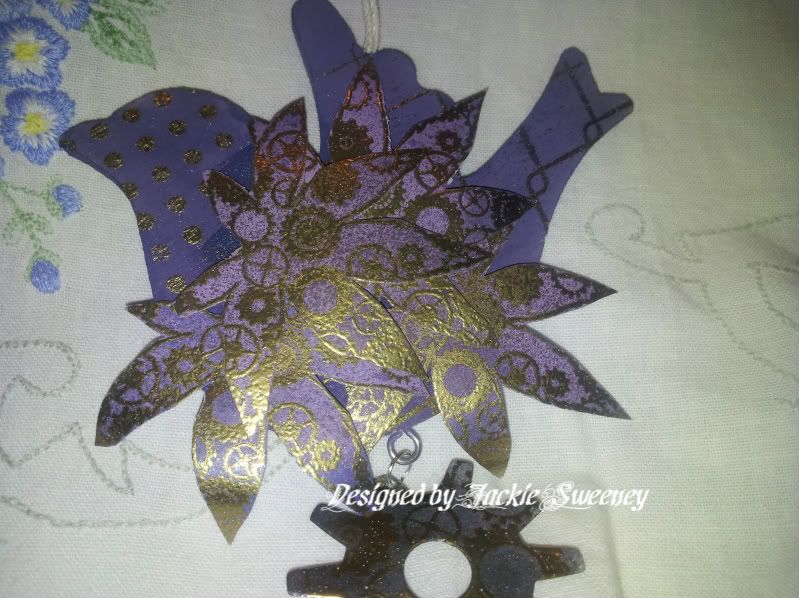
The 'copper' box was actually a UTEE'd piece I did at the workshop last week and make a complete pig's ear out of lol, so I left it out of the print tray and decided I'd do something with it when I got home, I alcohol inked up some 160gsm paper with terracotta and gold ink leaving a little bit of white which I then distressed using Forest Moss Distress ink! ( it gave a very cool 'rusty' look which I was after)! I then over stamped using the Artistic Stamper's Tick Tock flowers stamps! I stamped two big flowers, one small one and a leaf which I then made into a 'rose'?!
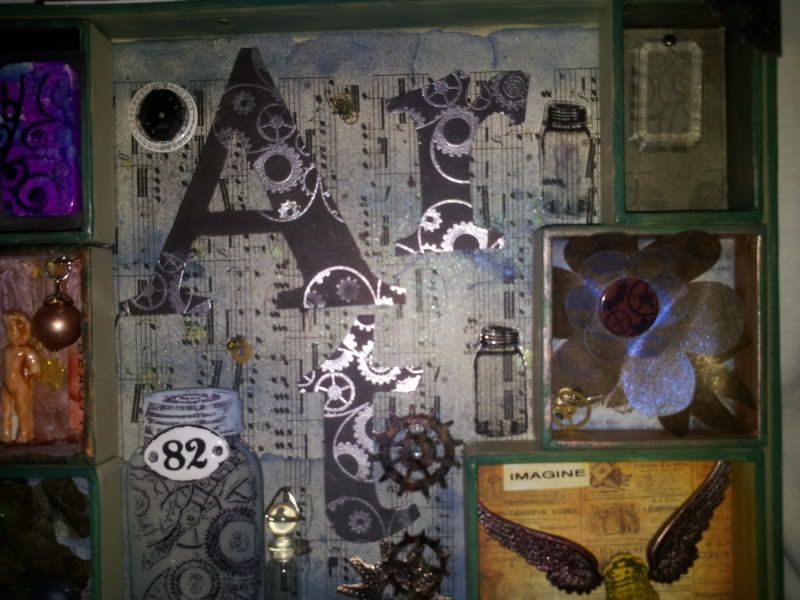
Tall vertical box -
Is supposed to be 'Mecano pieces lol They are off cuts of grey board really, I just drew round and ice lolly stick, painted them silver, alcohol inked them and then punched holes, I 'screwed' the pieces together to form the letter " A " using brads! Turned out rather cool I think lol!
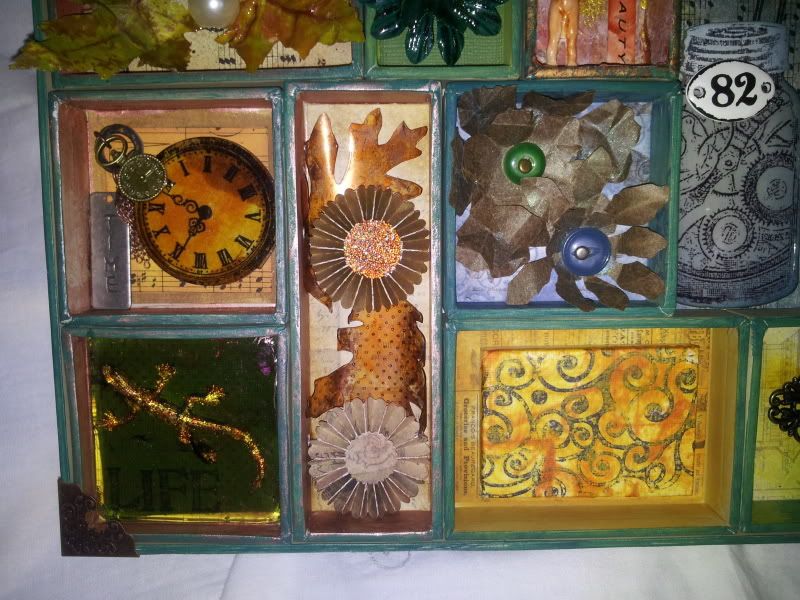
Small vertical box

Is another UTEE'd piece this time it contains a 'keyhole' bracket which was alcohol inked, and old key and a couple of screws.


Oh ! and the pendant thingie hanging from the space is an old broken key fob which I just obliterated the cutesy image with yet more alcohol ink!

I just added some spare screws a couple of paper clips and that beaded wire thingie was actually wrapped round a candle!

A piece that's NOT to everyone's taste I'll admit but I kinda like it, I has a bit of recycled industrial feel to it! And it's also just a wee bit of fun!

Thanks for looking in

Take care

Jackie x

Wednesday 26 October 2011

WOYWW 125

EEKS!! Very very 'messy' today! I've just finished that print tray that I started at the weekend at Jenny's workshop ! So all the bits 'n' pieces are still lying around from doing that!! Label printer, meltpot, glue gun, headphones for my phone (I like to listen to music while crafting! Nothing like a bit of heavy metal to get the creatitivty running) lol. Oh yeah and I wonder who's spotted my 'snack'! lol! Yep I love my mints! lol

So hopefully Julia will forgive me today! I somehow don't think I am going to get much crafting done today because a good tidy up is needed methinks before I start on a commision I was asked about last week!!

Thanks for dropping by

Take care and have a great day whatever you have planned

Jackie xx

Workshop project finished!!

YAY!! I finished my Tim Holtz print tray off today! I shut myself away in my bedroom/craft room all day today and just got on with it!


Now I'm HOPING this will post because I've had sooo many problems with Blogger today! It's been deleting comments, not uploading post and just generally being a complete P I T A !! ( pain in the a** ) !!


Anyway, here's the finished project ! Hope you like it because I love it! It's a great way to practice new techniques! :D

I'm not going to go through ALL the techniques used because we will be here for an eternity !! lol but here are a few close ups of some of the pieces!


Thanks for looking in ,

Take care all

Jackie x

Monday 24 October 2011

Sunday Stampers week 177


 For this weeks challenge over on Sunday stampers I decided to post a piece from  the project that I started at Jenny's workshop on Saturday. Here's a box that I finished off today from the Tim Holtz Configurations Print Tray!

Some old music backing paper which I had distressed and stuck down but I thought it was a tad 'bright' so I sprayed some antique brown and gold spray inks over the top to dull it down. Some " porcelain " leaves and a little wooden bird ornament that was painted then over stamped using the 'imperfect' stamping technique! lol...that technique seems to come naturally for me these days!! lol Added some charms of pearl beads, jump rings and paperclips to the bottom of the wee birdie!

Thanks for looking in

Jackie x