Saturday 12 October 2013

8x8 Mixed Media canvas.

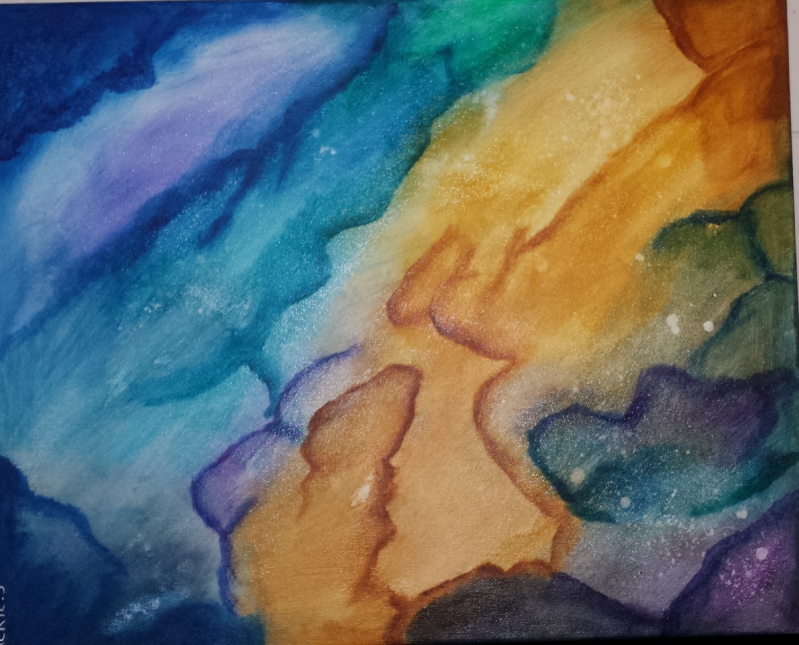
In my comfort zone with this piece!

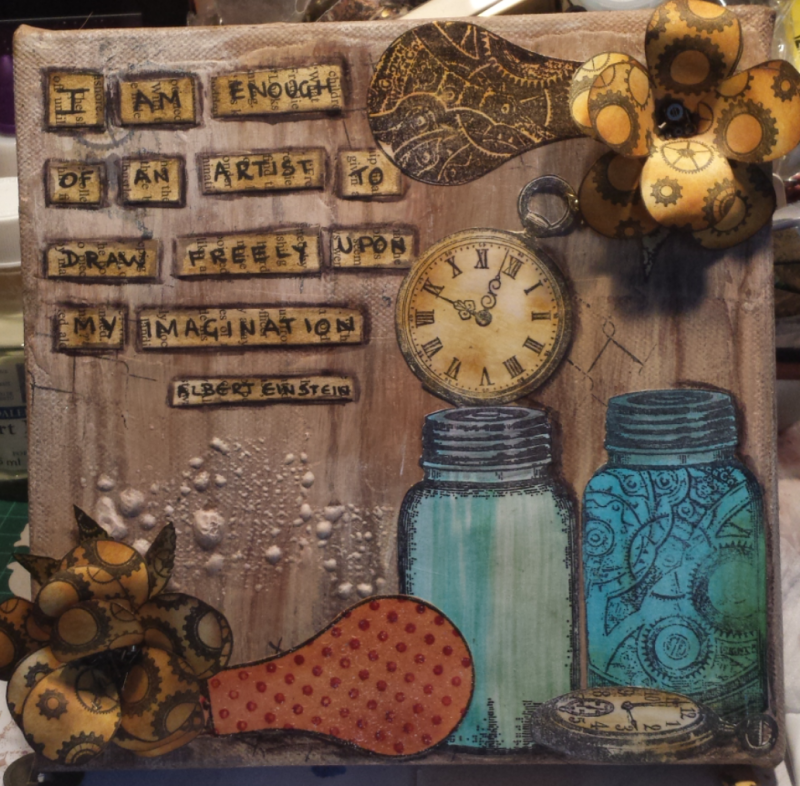
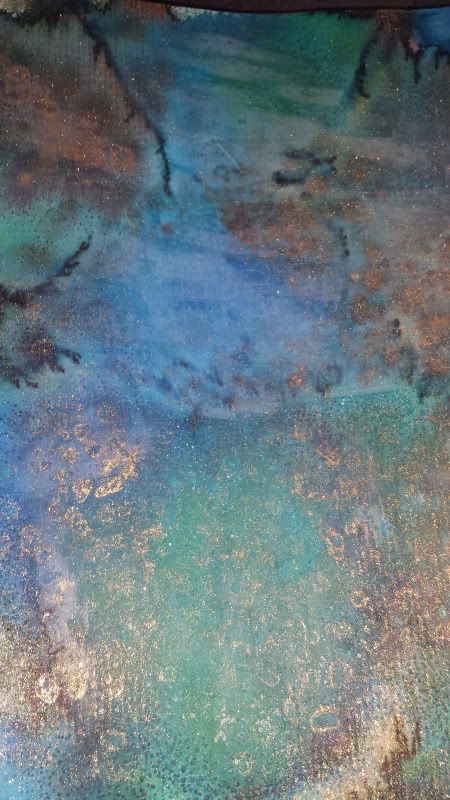
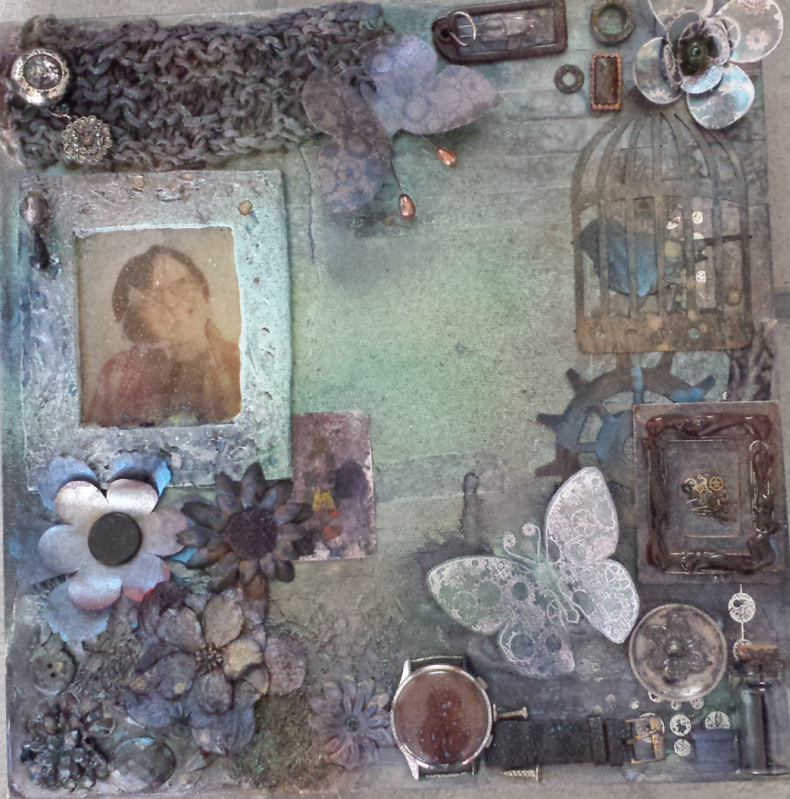
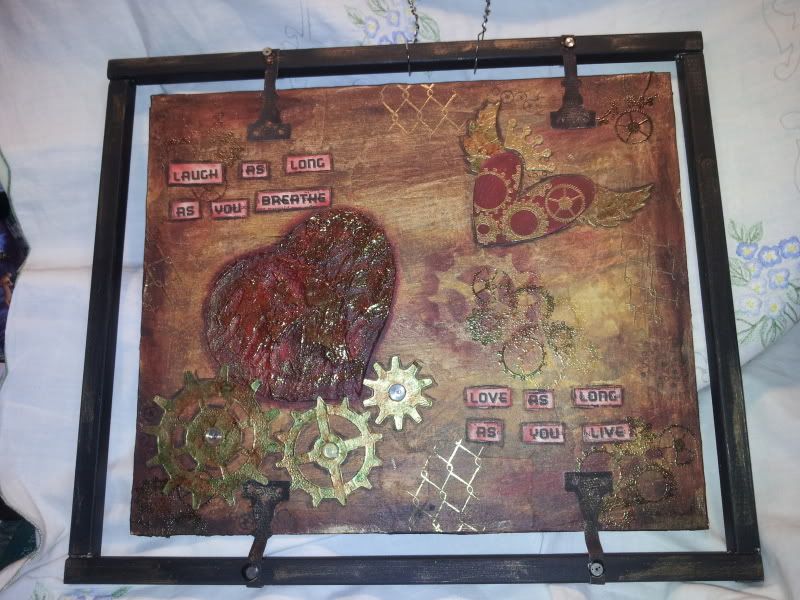
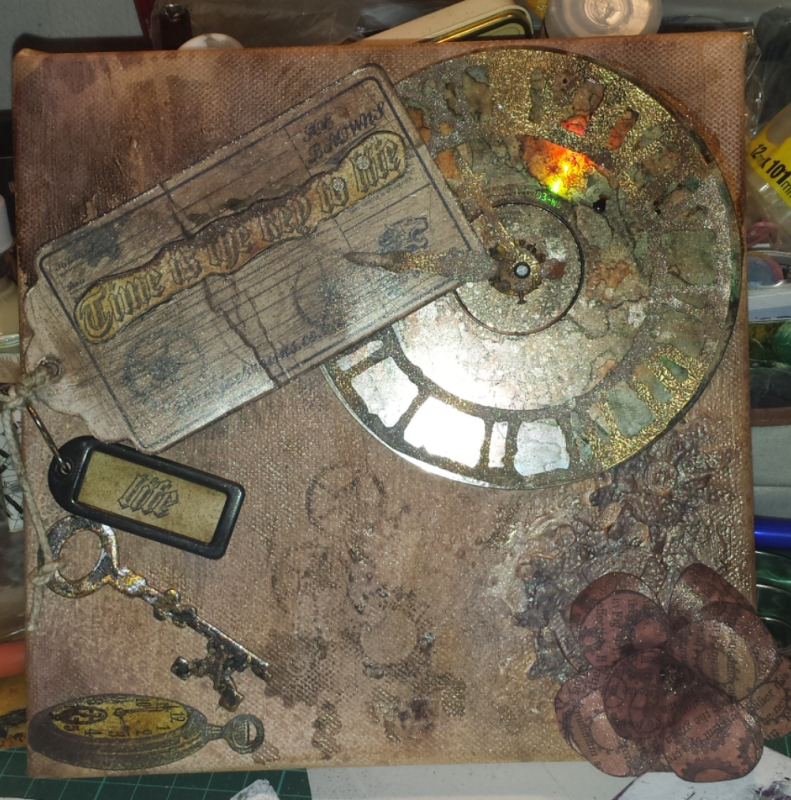
This is a 'reworked' canvas. I 'canabalised' an old piece I had that I wasn't very happy with, Gave it a good sanding down then a coat of gesso.  When dry, I  added a couple of die cut Cogs from foil that I had lying around in my stash, another coat of gesso was added. Gave the whole thing a zap with the heat gun to dry and make it crackle and bubble for texture. I randomly brushed over some acrylic paint to give a wood grain effect and the zapped it all with a heat gun again.

i used Tim Holtz Clocks and gearwheels masks and dry brushed through those with some brown acrylic paint. Over stamped that with the small cogs background stamp from the Artistic Stamper.

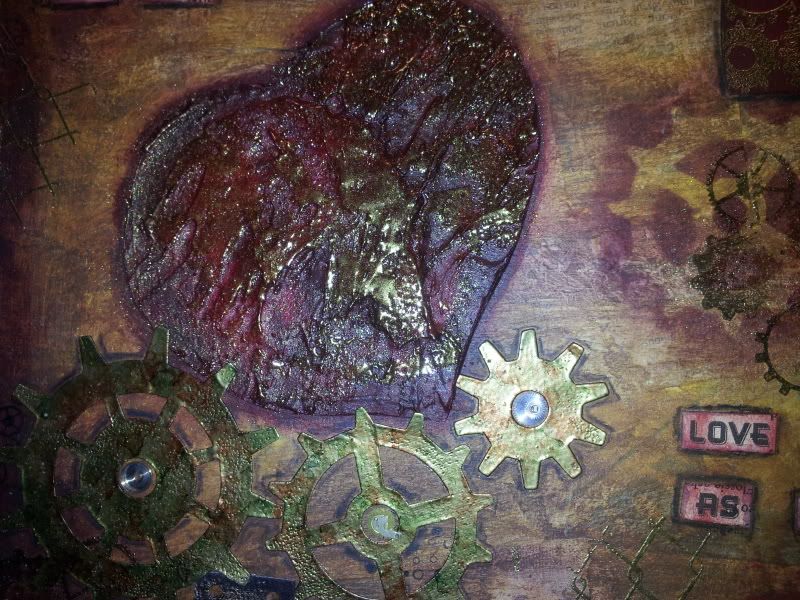
The clock is actually an old CD which was then covered with alcohol inks. The dial and hands are from the Weathered Clock Alterations die and glued down on top.

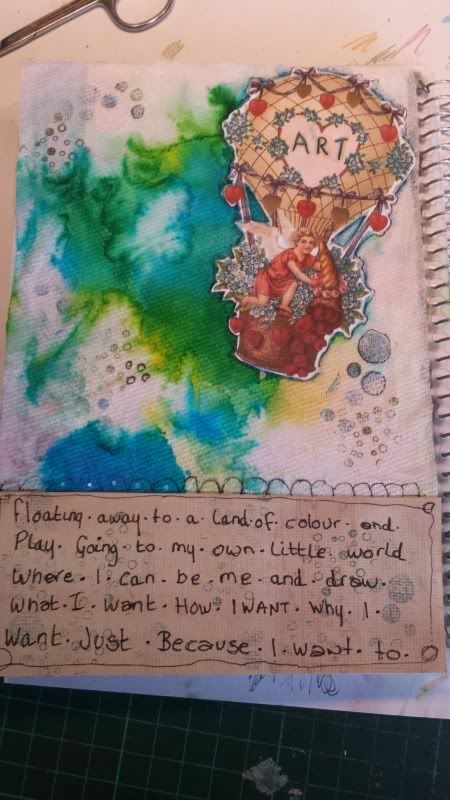
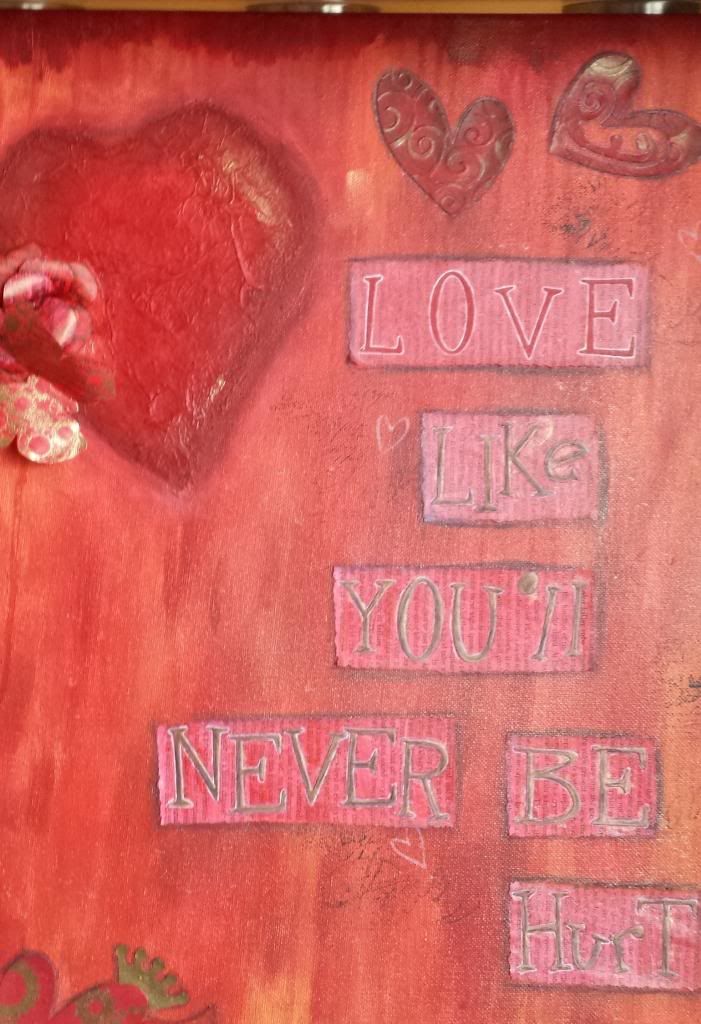
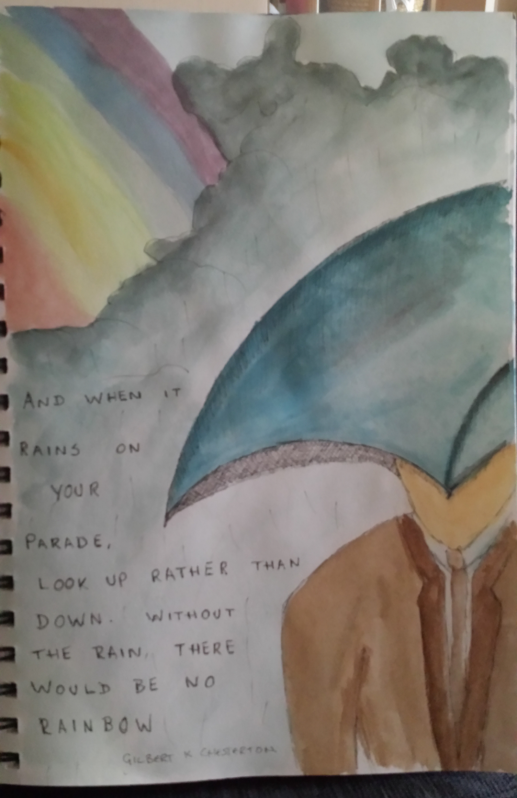
The label came from a pair of jeans, i sanded it down, distressed it using Antique stain distress ink and over stamped that with the cogs background stamp. The quote is from the Time theme plate stamp from The Artistic Stamper and was distressed using Brushed Corduroy ink pad. part of that phrase was used in the old key fob with the same technique.

The key is a die cut which i then gilded with gilding flakes, Over sprayed with Black Marble Dylusions to take the shine off it and then just gave a rub over with some black Stazon.

The pocket watch is again from the Time theme plate and was stamped onto card, distresses with Brushed Corduroy and then I heat embossed it with clear embossing powder to give it a 'glass' face.

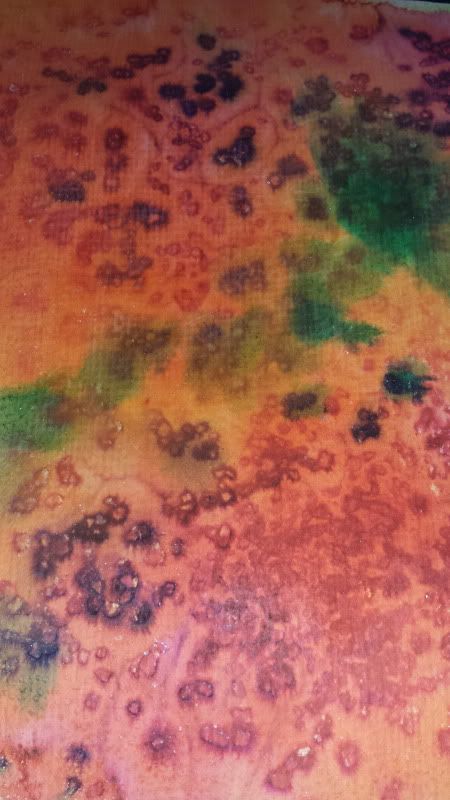
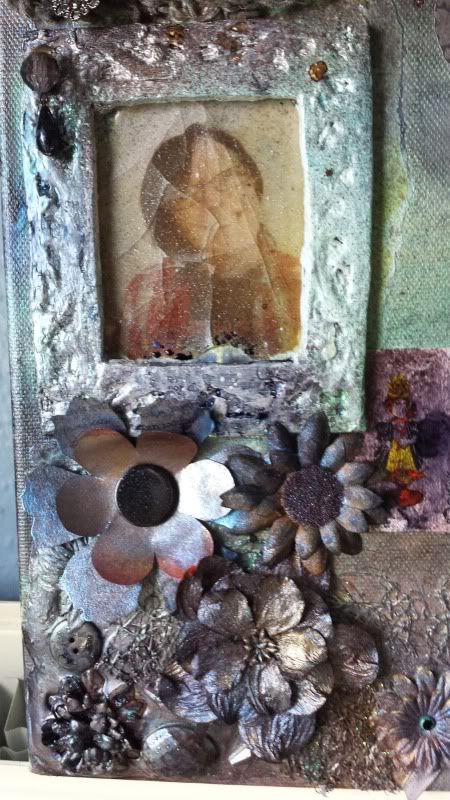
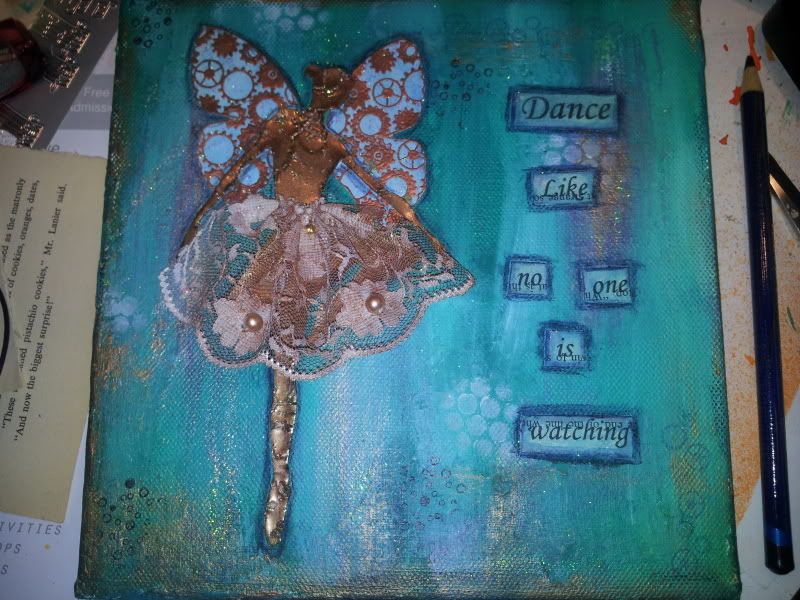
The 3D rose is from the Steampunk Roses theme plate again from The Artistic stamper and this was stamped onto an off cut of paper that had been sprayed with Dylusions Inks.

I just added some tiny watch parts to the centre of the rose to finish it off.

I had loads of fun making this piece and I think I will enter this in an Altered Art challenge.

Thanks for stopping by,

Take care and have a great day.

Jackie x


succeeding.....?

...well almost!!

I am thrilled to bits with the way this piece turned out! So thrilled in fact that I framed it and gave it to my best for his bithday!! He is a total fantatic when it comes to Dr Who ...and he was speechless when he saw it! Quite rare for him actually1 LOL !!

Again this was done in acrylics in my A£ journal, I just used an IKEA picture frame and made the mount from white card.

Trying to paint....

..... and not being very siccessful I'm afraid.

A bit 'gothic' here.....I am really not very good at the 'life' drawing yet, I simply haven't done any so not really sure how to go about things. This is a bit different and she has turned out ok considering, but I definitely do need a LOT more practice! Just done with acrylic paint in my A3 art journal.

More journal pages....

"Simple and Complicated" ...

Dylusions Inks sprays, Lemon Zest and Lime, Overstamped with a couple of background stamps and a label printed on my label maker. VERY simple but very effective.


Complicated....


This was done by using three Promarkers tied together and randomly scribbling on the page. I used some sequin waste, background stamps and again a label made with the lable maker.


Many apologies for not being around these days, just been kind of caught up in things at home that's all.

I have been spending a fair bit of time playing around with some ideas and working in my art journal. The images above are a couple of water colour sketches. Just some 'stuff' that was in my head really and looking to get out! No real details of any specific techniques here , only somebasic stamping on the "Toadstools" page with some Tapestry 'peg' stamps that's all. Oh and these are both A3 size.

Wednesday 17 July 2013

WOYWW 215

Well Wednesday again and not too much going on at my desk today, just a pile of journals looking for a place to be stored *sighs* and also an 8 x 8 mixed media canvas that I had finished and was left standing there after being photographed! Was really pleased with this piece and it can be found HERE if you are interested in taking a look.

That's about it for today, all very quick as I have loads to do today, but if you are wondering why I am showing off my ...erm... 'creative' space then please pop over to Julia's place to see what all the fuss and fun is about.

Take care, thanks for dropping by

and

Happy WOYWW

Jackie x

8 x 8 Mixed Media - "Imagination"

Well , what can I say! It DID take some imagination to get this piece to work in the end!

It is a 'reworked' piece, and by that I mean an old canvas that had been previously painted and collaged and I wasn't happy with. So I decided to 'canabalise' it and do something else. There are so many layers on this piece it defies belief!!
Firstly I removed what I could from the piece while it was dry, I wanted quite a bit of texture and wasn't really happy with the result so I gave it a spritz of water and then gave it all a good rub over , this managed to remove a couple of the previously collaged layers in places, when it was dry I gave it a rub with some sandpaper and a wipe over with a damp cloth just to get rid of the 'bits'.

The whole thing then got a coat of Gesso and was set aside to dry. I used a few techniques for the background - random painting with acrylic,  some crackle finish with PVA Glue and acrylic paint, more random painting with acrylic paint and when I zapped it with the heat gun to dry it quick the layers started to bubble - Nice! LOVED this idea so just kept it in the piece! I ended up highlight that with a lighter shade of paint using the 'dry brush' technique. I love when you  have 'happy accidents'!

The Jars, light bulbs and flowers are stamps from The Artistic Stamper and from her Steampunk range , ! I LOVE these stamps!  The Pocket Watches and Chicken Wire background stamp were also used.

The bottom light bulb was the plain bulb and was stamped onto paper coloured with Distress Stain in Wild Honey, I then over stamped it with Dots Background in Fired Brick Distress Ink and then triple embossed it, sadly the photo doesn't show this.

The Jars and watches were done in a similar way only I used gloss medium to 'varnish' the jars and a Sakura glaze pen on the watches.
The Quote is from Albert Einstein and is handwritten on some old book pages which were coloured with Brushed Corduroy Distress Ink.

REALLY pleased with this piece and I have had a lot good feedback about this so this one will be used for 'show' and may even end up with a companion because it has given me an idea to do something more with those pocket watches!

Thanks for dropping by,

Take care

Jackie x


Wednesday 10 July 2013

Junk Journal .

Those of you who follow me know that I take part in the WOYWW blog hop every wednesday - there is a clickable link in my sidebar , just look for the WOYWW badge - . When I shared my desk this week that little journal was sitting there as I had been working on it. I was asked if I could show pictures and explain what I have to it so far so here goes....


It is in fact an old High School diary/organsier belonging to my son. he was going to throw it away but I manage to rescue it. It is A5 size and I plan on using 'desktop scraps' and as many recycled things as I can for decorating it.

Now here is a photo of the front cover. It is clear plastic and no matter what I used the papers just would not stick so had to resort to double sided sticky tape and will use a few clips as well.....*note to oneself - snad it down next time* ...

The cover :- Some off cuts of decorative papers, stamped tissue paper, an oddment of lace and  some beads. The 'paintpots' are cut from one of those colour swatch magazines you get from the DIY stores.

This is the inside of the plastic cover, A piece of 'mop-up' kitchen roll from using the Dylusions inks sprays, and image from a CD rom printed off aaaaages ago, and an offcut of card for the journalling.


This is the  back side of the cardboard cover behind the plastic cover, because this was palin white I didn't need to do anything to it so thought it was perfect for painting on. I didn't set out to 'do' anything to this page just started by making some 'marks' with Inktense pencils and this is what turned out.

This is the page opposite , now these pages are very thin so I stuck two of them together, so they wouldn't disintegrate when I put 'stuff' on them! I gave this one a base of gesso first, used acrylic inks for the background and just drew the letters with Inktense pencils. the journaling is done using black pitt fineliners and a white posca paint marker.


The two photos above are just to show what the pages are like untreated so to speak.

Really looking forward to the challenge of this little book, will be interesting to see what I can come up with just with using the 'scraps' that were lying on my desk 'unused'!

Thanks for dropping by,

Take care

Jackie x

WOYWW 214

Wednesday again!! Sheesh! Where did the week go? .... Many Thanks to those of you who dropped by and left comments last week and sincere apologies for not being able to visit as may of you as I'd liked to have done.

This picture was taken last night before I stopped for the night hence the horrible lighting. In 'mid-flow' on a little 'junk journal' ( an old high school diary belonging to my son) here so you can see the 'stuff' I was using for that page. PLEASE CLICK HERE FOR A LOOK A couple of tins of Inktense pencils, some pens glue and other bits and pieces. Got a box of Acrylic Inks sitting on top of that Thesaurus draped in the lovely white wires of my headphones for my phone!! Behind that is a set of stacking boxes which contain alcohol inks and all the accoutriments, next to that is a humungus ginormous tub of gesso along with Gloss medium, matt medium glue and a pencil sharepener! That big canvas stow-it-all /organiser (yeah right) is in a serious need of some clearing out (like whenever)! lol

So there you have it....What's On my Workdesk today....if you are wondering what all this is about then please pop over to Julia's and have a wee looksee. There you have can have a look at what the world has on their desks!

Take care and thanks for dropping by

Jackie x

Sunday 7 July 2013

Watercolour Sketches.

Just having a little play with some watercolours. Not really done much with these so decided it was time to try them out.

A couple of intuitive images in my A3 Sketchbook and i am really pleased with the way they have turned out.

Just painted what was in my head really  so there was no real 'aim or goal'. I work like this most of the time as my head is soooo full of 'stuff' so there are plenty ideas there lol!

Not really many techniques to go through, just watercolour paints and pen and ink detailing.

Thanks for looking

Jackie x

20 x 16 inch Canvas (pt 2)

Good morning everyone , and such a beautiful day it is too, going to another scorcher today methinks.

Anyway, here is the second installment of the 'set of four' canvas saga!

This one I struggled with a little and I think that was purely down to the colour! but I managed it and reworked a couple of things to get them to stand out better.  You will get a better look if you click on the image to enlarge it a little.

Not as happy with this as I was the 'Dance' piece but it is much better than it was before! This photo really does not do it any justice at all becuase there are some lovely Bronze highlights and some background stamping as well.

Just a quick post today as I have a few other things I want to do.

Take care and enjoy your day.

Jackie x

Wednesday 3 July 2013

WOYWW 213

Wow Wednesday already, where did the last week go !

Shock and horror !! I actually gave my crafty space a wee tidy up!! Still got loads to do but at least I can move around a little !

Felt like doing a little journaling in my new A3 Pink Pig Sketchbook ! I LOVE these sketchbooks!! Used them all the time at college hence the fact I bought a 'couple' before I left...at those prices I wasn't turning them down! They can be a tad pricey in the 'real world'! That big one was £3:50 so enough said!!

I just wanted to say a huge thank you to all of you who left wonderful comments last week I really do appreciate them all. So without further ado I will show you all the finished CANVAS I was working on when you all popped in last week. I would also like to apologise for not being able to take time to visit you all, just ran out of hours.... I had a visitor staying last week.

Anyway if you would like to know what I'm prattling on about and why on earth I'm revealing what's on my workdesk then pop over to JULIA'S to find out. Enjoy your journey!

I am off to do lots of 'paperwork' and computer work today so no crafting for me I'm afraid.

Take care Happy WOYWW

Jackie x

Friday 28 June 2013

Mixed Media Canvas.

Taaa Daaah ! Finally finished it ! Only taken me nearly three days! Would have done it a lot quicker but had too many  interruptions!

Anyway, I am thriloled to bits with the way this has turned out! Because it's MASSIVE !! 20 x 16 inches!! This is part of a set of four. The other three will be based on the other lines of that poem.

Now the eagle eyed among you will notice that I have done a piece similar to this only a lot smaller for an Art Exhibition in The MacRobert art centre in Stirling earlier on this year, it was only an 8x8 inch and in a different colour, and it SOLD!! :D

Now down to the nitty gritty of how it was all done....first of all it was a limited colour palette, Blues, purples, a tiny smidgin of white and lots of mat medium!

I just randomly painted the background with blues and purples acrylic paint mixed with mat medium.

The dancer is a clip art image which was enlarged, I cut the dancer out and used what was left behind as a stencil, I sponged some gesso through the stencil and when it was dry I stuck wrinkled tissue paper to it with lots of mat medium. When that was dry I then painted her in Pthalo Blue again mixed with mat medium.

I randomly stamped some background stamps over the canvas with acrylic paint . These are various background stamps from The Artistic Stamper.

The Roses and Butterfly are from The Artistic Stamper Steampunk range and are done on  old books pages which were painted over. The words are  Sizzix Alphabet dies and are stuck down on painted book pages.

The 'trees' are an Alteration strip die which is actually branches and birds. They were cut in Navy blue card which was oversprayed with Cosmic shimmer  in blue .
I used a couple of fancy headed pins for the butterfly anttenae. Some old vintage lace which was sprayed with a dark blue cosmic shimmer ink and dry brushed with blue acrylic paint. I added some beads to the waitband to finsihe it off and also hide the stitching for the gathering. I also used some glass beads for the centres of the roses.

The words are edged in white  and silver sakura gel pens and some Inktense pencils and just to add a little sparkle I randomly smeared on some clear rock candy stickles glitter glue!

Below you can see some close ups of the various part of this piece.


Close up of the Roses....


The dancer and her skirt ...
and the butterfly ...


I really did enjoy making this piece and had loads of fun, didn't really think I would because as I said earlier I've done this piece before. Still working on the larger size was great and let me be a lot more creative in filling the space.

Thank you for dropping by and taking the time out to read.

Take care .

Jackie x


Tuesday 25 June 2013

WOYWW 212

Yep ! It's another messy one again this week! A very busy one though, currently working on that waay too large for my desk canvas this week, it's still a work in progress so will show it off when it's completed. Pleased with the way it's looking so far though.....but if you fancy a wee look at some other fancy clean and tidy (or not) desks then pop over to     JULIA'S  to see what all the fuss is about.
 

While on the subject of work desks... I would just like to say a huge "THANK YOU" for all your lovely visits and comments you left on my blog last week. I really do appreciate them all so much. It's good to be back.

Just a quick post this week as I'm off out today with my mum. :D Hope to visit you all when I get back .

Take care and Happy WOYWW !

Jackie x

Wednesday 19 June 2013

What's On Your Workdesk 211

Yep! It's me ! The messy one is back!! My poor craft desk has lain neglected for months and turned into somewhat of a 'dumping ground' I'm afraid thanks to an NC Art and Design course at the local college. I finished that last week and have been using the time to catch up on 'stuff'. This will probably be my next ' to do '  project!! Tidy it up a little I think!! LITTLE?...erm try a LOT!!

Anyway, I would just like to apologise for being AWOL for so long , I just couldn't seem to fit this in along with all the course work AND the homework! Wow ! Did we get hammered with that or what? !!

Still, I have learned so much on this course and I have have loads of inspiration and new ideas that I would like to try out. (IF I can ever get that desk tidied up that is).

Right, I'm off for a wee nosey around everyone else's desks on this wonderful inspirational bloghop that is WOYWW over at Julia's place  so I may be gone for a while !!


Oh, before I go.... I just KNOW some of you will be curious as to what's under the bubble wrap?! ... It is a project that I did for Sculpting class, a clay tile that was made by taking a piece of a drawing/photograph, carving it out on the clay then making an opposite using plaster of paris! LOVE this as you have a 'positive and negative' image if you will. Glad we did this because when I was about to carve the tile I wasn't sure which pieces would look better 'taken away' or left. This gives me a look at how it would have been either way.

Right, rambling over for now.

Take care everyone, have a great WOYWW!

Thanks for dropping by

Jackie x

Saturday 15 June 2013

Rain !

Good afternoon everyone....not the best of weather today and all my poor mates who are off to the Download music festival to see Iron Maiden are going to be up to their knees in muck!!

Anyway...I have had this image of a "faceless" man with an umbrella in my head for days and I have no idea why or where it came from. Sooooo seeing as the eeathet is totally rotten today I thought I'd try and put it on paper to see how it would turn out. It's quite creepy actually because this is EXACTLY how it looked in my head. I used Reeves Watercolours for this. Don't normally work in watercolours so these ones are a budget variety.

On that note I shall be off. Hope the weekend weather brightens up a little. Take care and thanks for dropping by.

Jackie x

Saturday 8 June 2013

Spray inks and rocksalt!

Good afternoon eveyrone, such a glorious day to be stuck inside playing so I went outside to enjoy the weather. Not very often Scotland has it warm sunny so I'm making the most of it while it lasts!

Seeing as I'm coming to the end of my college course all of my class work AND HOMEWORK is now finished... YAY ! .... I find myself with more time to ry out some of the techniques we learned in class.

The photograph above is a variation of one I tried with watercolour paints , so I gave it a wee try just to see how it would turn out. REALLY pleased with this and I will definitley use it again. Makes great backgrounds!


This was done on WATERCOLOUR paper, simply because it needs to very VERY wet to get such good results so I would advise on using only the watercolour paper.

I sprayed on some Vibrant Turquoise and London Blue Dylusions inks,  and some Copper Coloured Cosmic Shimmer, blended them together with a water spray then just sprinkled over a generous ammount of rocksalt, left it to sit for about 5 mins then sprayed over again with the same colours. I set the page out in the sun to dry! You are better to let this AIR DRY though, so patience is a must. I think you get better results rahter than using a heat gun. Drying times all depend on the conditions really. Mine dried super quick because it's scorching in Scotland today.


Here is one I did in different colours, exactly the same technique on this time Iused some of the salt that I had brushed off the previous one as well as fresh salt just to see what happened, got a nice bit of colour transferrance and you can really see the texture on this piece.

Had fun doing this and you can bet I'll be using this technique again. But don't think I'll use the 'brights', much prefer the muted colurs and the copper addition.

Anyway, it's a lovely day som I'm going to sit outside and have a little arty play.

Take care and enjoy your weekend everyone, Thaks for dropping by,

Jackie x


Tuesday 4 June 2013

Playing with Acrylics.

Good evening everyone.

Today was a glorious day and a day off from college as I have passed the classes I had on for today so didn't need to go in.  Was given a directed study day and really glad I was because the weather was stunning.

So I spent some time sitting outside in the garden just sketching and playing around with a few ideas.
Came back inside for a while and decided to have a wee practice at painting. Not really my strong point and it shows but it was fun to try out.

Just a quick post from my phone so please excuse any mistakes.

Take care everyone and thanks for dropping by.


Jackie xx

Wednesday 29 May 2013

Mixed Media.

I have had this idea in my head for ages but couldn't really do anything about it until now.

First of all the big background piece is a Batik piece that was created for Textiles, the smaller piece is a lino print and that was done in Printmaking class a few weeks after. The fact that these two pieces go really well together is a complete accident and something I didn't really pay attention to until I had completed the printmaking images.

I couldn't put this together because the pieces were in sketchbooks which were needed for assessment, so I had to wait until that was done, so as both subjects have now been passed it was okay for me to go ahead.

Many MANY apologies for the seriously naff photograph though, it was late when I got finished and my camera wasn't working so I had to use my mobile phone. That nasty rag is there to stop the picture from sliding down!!

I am going to enter this for the class exhibition. That way there is a piece used involving all the lecturers....does that make sense?

Anyway, I'm off for a while, 'sneaking' this post in while in class, well not really 'sneaking' as everybody can see what I'm doing anyway!!. Finished my class work for now and just waiting on a checklist to see if there's anything else I need to do.

Take care and thanks for dropping by.

Jackie x


Sunday 26 May 2013

Mixed Media self portrait.

This piece was started as a final project for mixed media class in college. My lecturer wasn't really too happy about me submitting it and wanted me to do something else, which i did and didn't like the end result. So having made a really good start on this and with all the annotation being done I decided I wasn't going to let it go to waste and just finish it off.

It is based on and inspired by Finnabair , who's work I think is amazing !

I won't go into a massive big spiel about the whole piece because I think you can basically see what was used, but I will explain certain techniques in simplified form or else I'd be here for ages lol !

First of all my photograph was loaded into Photoshop, I just used some of the filters to alter it slightly, printed it off the proceeded to rip it up! The frame it's in is actually made from some air drying clay. I used a Sizzix 'Frame' die cut and traced around it, also used a clay work tool to trace through the shapes on the frame. Set it aside to dry and then painted it with acrylic paint. I triple embossed the photograph and when cool, I 'cracked' the embossing. I then stick the photo behind the frame.

The bottom left hand corner is actually some pollyfilla and pva glue. while this was still wet I embedded some beads, buttons and various other objects also added some fusible fibres and some paper flowers.

The butterflies and 3D roses are from The Artistic Stamper Steampunk range  . I LOVE these stamps and have used them a lot in projects!

All the other 'oddments' are basically 'stuff' that was found in my stash or my 'junk drawer'....now i know you all have one of those!! lol.

Old key fobs, broken jewellery, broken watches, miniature playing cards, etc.

The top left hand corner is a piece of knitting done with ribbon yarn.
Just added various die cuts and a few other bits and pieces.
I sprayed over the whole thing with Glimmer Mists in Blue and Green, Used a darker Blue Cosmic Shimmer and a Copper cosmic Shimmer.
I also used Dylusions Blackand  Brown.


Here are a couple of close ups of the details.... top right hand corner,


Bottom left hand corner....

I am really pleased with the way this has turned out. I am going to take it in to class on Monday anyway just to find out the reaction. I may get to use it as my final piece in the end because all the work is done on it, but we shall see.

Thanks for dropping by, feel free to ask if you have any questions and I'll do my best to help.

Take care and Happy Bank Holiday to those of you who have one. (we had two days at the start of the month in Scotland).

Take care

Jackie xx

Sunday 12 May 2013

A little "Abstract" !


Just a quick post tonight, been playing with Acrylics paints. I was really just playing with some brush techniques, blending medium and colours. Just wanted to see what I could achieve. Had lots of fun wondering what the end results would be like. A nice welcome distraction to a rather traumatic week!

So I have ended up with two lovely 20 x 16" abstract paintings in lovely rich and strong colours!

I'm off for the night to relax before the mad rush for college tomorrow.

Take care and thanks for dropping by

Jackie x


Monday 29 April 2013

Final project for Art class is now finished!


Sorry the photos are not up to much but I used my phone as there was no camera available today.

Anyway, I have been working on this piece for months now and I'm glad it's all finished!

There were four 'briefs' to choose from. I chose the Fine Art one because it was very 'open' but had to base it on my Environment, which was fine by me because I was still in "buildings" mode from the previous block of lessons, so rather than do a whole rethink, I just kind of carried on.

The "oil drum" is made from a cardboard box. just cut a big disc and a couple of strips, stuck it all together using a hot glue gun and some gummed parcel tape. When dry I painted it with roughly mixed black, brown and green acrylic paint. I wanted an old rusty look and it's turned out pretty well.

The inside of the drum sides were painted plain black. I left the base free as I knew I would be adding the background later.

LEFT SIDE base.
This was done using a set of blueprints/plans that were found in another studio at college by my lecturer, they were perfect for what I was looking for, so I over sprayed with Bronze Cosmic Shimmer inks.
The Flaring tower is done on some off cuts of greyboard which was painted very dark black/brown and then gone over using Terracotta Alcohol inks again to get a rusty look, this half of the drum is supposed to depict a 'sunset' hence the silhouette. The guy ropes for the tower are done by cutting up some old broken earphones for an MP3 player. The cogs are diecuts and the 'pipes' are Allen keys and an old bike spanner which were coloured using Alcohol inks.

RIGHT SIDE
Sky - Encaustic wax.
Building - This is the main building of Forth Valley College (Falkirk Campus) and was painte3d using Gouache paints, I overstamped the front to give a bit of texture with the Chicken Wire Background Stamp from the Artisitc Stamper, there is actually a kind of 'honeycomb' texture to the front of the building and that stamp worked perfectly!

CENTRE
To hide the join i used the Branches diecuts and turned them into trees, and then stained them with Distress inks.
The 3D roses are done using an image of the college logo which was printed out in different sizes, then stamped on the back using the Clockwork Flowers Stamp from The Artistic Stamper, I coloured the flowers using Distress inks and toned them to match the colours of the painting. There are beautiful cherry blossom trees along the front of the main entrance to college so these roses kind of represent that feature.


FINISHING TOUCHES
I used an old set of stencils for the word "OIL" on the front of the drum, and brought in my meltpot and used Black and Interference Blue UTEE mixed together, and pured it over the side of the drum, just left it to run in whatever direction it wanted.

I am thrilled to bits with the way it has turned out ! My lecturer thinks it's brilliant and thinks it's of a very high standard for an NC student,  His words not mine and a compliment he paid to whole class I may add.

As I said earlier I have been working on this piece for months, not just the end product but also working in my sketchbook too, and, I'm really pleased with the the way it all came together.

Thanks for taking the time out to pop by,

Take care

Jackie xx

Wednesday 6 March 2013

Love ! Steampunk Style !

well, I  managed to squeeze in some more "me" time and did a little crafting for myself. I've had this idea in my head for a while and decided it was time to try and see what I could do with it.

I started off with a canvas board that I had done something else and wasn't happy with so I decided to recycle it. I pasted some torn up newspaper over the base with wallpaper paste. When it was dry I gave the whole thing a coat of Gesso, left it aside overnight to dry then painted over it randomly with acrylic paint , rubbing away some paint with  kitchen roll to let some of the newsprint show through. I also used some die-cut cogs as stencils and dry brushed around them randomly over the background.

The big heart is textured and done using Pollyfilla mixed with PVA glue instead of water. I drew a big heart shape on a piece of card then cut it out, stuck the "stencil" down with some pritt stick and them spread over the home made texture paste. Lifted off the stencil and then it dry overnight.  I then gessod' over the heart and when dry I painted it rubbing some paint off to try and give it some 'shading'. when dry I embossed with Cosmic Shimmer gold embossing powder.

Here is a close up of the textured heart


The cogs are the Alterations Gadget Gears die which have been embossed with gold embossing powder then gone over with some alcohols inks to give a bit of a rusty look. Did the same with the wings and crown from the Alterations Winged Heart die. The small heart is just painted red, and over stamped and embossed using the Small Cogs stamp from The Artistic Stamper background stamp. I used the same stamp randomly over the background but stamped twice, once with black Archival ink and again in clear versamark which was then embossed with cosmic shimmer gold embossing powder. I also used a chicken wire background stamp and embossed that in gold randomly as well as some small cogs.

The frame is an old slot together tapestry frame which was painted black/brown. I attatched the picture using a  door hinges  die cut from grunge paper and then painted black, I cut off the fancy end and then glued them to the frame, gave them extra support with a drawing pin painted over with black promarker. For hanging I just twisted some wire together. I added some watch parts to the centre of the cogs and also the drawing pins, then dry brushed over some copper colour acrylic paint just to age it a little. The quote is one from Johnny Depp and was printed off onto some old book pages and distressed with Fired Brick distress ink.

Really pleased with the way this has turned out, as I said earlier it was just an idea and I wasn't really sure what I was going to do to attatch it to the frame, but as I was working on it things just seem to fall into place.

Thanks for dropping by and taking the time out to read.

Take care everyone.

Jackie x


Saturday 9 February 2013

A little 6 x 6 mixed media canvas.

Been having another play with some mixed media stuff today and I am really pleased with the end result for a change!

Started out with an old 6 x 6 canvas that I had done previously and didn't like it , so I  'canibalised' it! Managed to leave some seriously stuck paper to it which was a bonus because it actually gave me a little texture.

Anyway, I gave the whole a going over with some Gesso, when dry, I randomly painted on some acrylic paint, added another colour, some white and a little copper metallic paint.

The 'fairy' is the same as the previous one done in the journal page, a clip art image which was shrunk down. I used versamark clear ink and then heat embossed her in copper, added another coat then stamped into it while still hot with  my favourite crackle background stamp.

Her wings are done using the Tick Tock Butterfly stamp from The Artistic Stamper and stamped using versamark clear and copper embossing powder. Her skirt is a piece of cream beaded lace I had in my stash so I just lightly painted it with copper metallic paint and then when dry I gathered it up  with a few stitches and then stuck it down with a hot glue gun

Printed the phrase off onto some old book pages and coloured them using Denim Distress ink.  Randomly stamped a cogs border and spot border and also used a little sequin waste with some white acrylic paint.  Edged everything off with an Indigo Blue Inktense pencil and then rubbed over some Crystal Stickles!

Really pleased with this piece and I am thinking about entering it into an exhibition being run by the college. Not very often I am confident about my work but this piece has changed that for the time being.

Thanks for reading,

Take care and enjoy the rest of your weekend.

Jackie x

Thursday 7 February 2013

An explosion of colour!


Well, I've had a little "me" break yesterday/today....needed to take some time out from college art and do some of my own. So, I spent some time working on a journal page.

I sprayed the background with Dylusions Lemon Zest, Squeezed Orange and Bubblegum pink onto lots of water to let them all blend in together.. when dry, I randomly stamped over it using Fired Brick Distress inks and Black Archival ink.

The "fairy's wings" are actually stamped using the Patchwork Butterfly Themeplate from Chocolate Baroque as are the random stamps of swirls and a half butterfly in the background.

I coloured the wings using Inktense pencils....LOVE these pencils!! ..... now on to the ballerina....this was a clip art  image from Microsoft word which i just enlarged....i printed it off twice. Carefully cut out the ballerina from one image and used what was left as a stencil. I drew around it with an inktense pencil and then overstamped the 'space' with my favourite crackle background stamp using Fired Brick Distress Ink. I was originally going to colour the ballerina all black and use her as a silhouette but changed mind and decided to colour her instead, again using Inktense pencils.

Wasn't very happy with the background so I added some stencils and doodles to 'finish' it off a little.

Once everything was stuck down I then edged it with a black intense pencil to make it stand out a little.

A bit of a change from me this time as I don't normally 'do' bright and girlie but I am surprised at the way it's turned out despite the fact I hate orange! I find it such a 'difficult' colour...always have and always will lol.


Thanks for dropping by,

Take care

Jackie x