Sunday 30 October 2011

Sunday Stampers week 178

The Theme this week over on The Sunday Stampers Challenge is Halloween/Bats!

And trust me! This WAS a challenge for me, because, I have nothing remotely Halloween-ie in my craft stash AT ALL!! Simply because I am on such a tight budget that I tend to buy products I can use all year round rather than just once a year, if you get my meaning.

Anyway - to the tag....

A plain white tag distressed with, Wild Honey, Dried Marigold, Fired Brick and Forest Moss. I over stamped the background with a crackle background stamp using Brushed Corduroy Distress Ink.  The bats came courtesy of google lol I printed them off, cut a couple of them out and then stamped over them with the crackle background stamp and clear embossed over that!  The tree is the decorative strip Birds and Branches die, I just cut some of the branches back and cut the leaves off!  I then Distressed around the edge of the tag using Black Memento and a bit of a kitchen sponge, I don't have any proper Black Distress ink I'm afraid, so I kind of had to improvise a little! lol

I added some ribbon which was white, coloured it with an Orange Pro Marker and a Black Pro marker! 

 Improvisation seems to have been the whole story with this tag really but it's turned out ok considering!

Thanks for looking in,

Happy Stamping

Jackie x

Friday 28 October 2011

Quick Birthday Card!


Good Evening blogland! I've actually made a card!! My first card in aaaaaaaaaages!! Quite pleased with the way this has turned out actually.

It's a Birthday Card for Cameron's Gran so I wanted to keep it fairly clean and simple!

I very lightly distressed  base cream coloured card with Wild Honey and Dried Marigold distress inks, distressed the small mat with the same colour only heavier, then stamped out the phrase which is from The Artistic Stamper in Versafine Vintage sepia.

I stamped the jars  which are again from The Artistic Stamper in the Vintage sepia and very lightly distressed them with the Wild Honey and Dried Marigold, I also used a little Forest Moss , I was trying for the 'old green glass' look...it turned out not too bad actually. I just added some Flora Doodles silk flowers and the middle one is just paper, coloured and embossed with clear embossing powder to give it a shine!

Really pleased with the way this has turned out because it's my first card in a long while, I've been to busy doing books and altering 'stuff' lol!!

Thanks for looking in

Have a lovely evening and a great weekend! I'm off to the SECC in Glasgow tomorrow! :D

Jackie x

Thursday 27 October 2011

A Screw loose??......

Toolbox trash + Tabletop scraps + spare configurations boxes = ....


These were the boxes left over from my print tray project! Now please excuse the quality of the photo but this piece was a bit difficult to capture!


First of all I found what way I wanted the boxes, stuck them all together and then covered them with torn, crinkled and creased white tissue paper! I painted over the whole thing with Black Metallic acrylic paint and then set aside to dry,

The boxes and contents -

Small top box - A UTEE piece and a bit difficult to see the 'contents' - An alan key which is alcohol inked, screws, nails, a safety pin, a paper clip and a little odd shaped wire connector thingie!

Second row left to right -

small box is a simple piece, just a bamboo domino alcohol inked and using a promarker blender pen for the writing!

Large box - background of wire wool! A couple of big nuts and bolts and some off cuts of copper pipe which I alcohol inked!

Bottom row left to right -
The 'copper' box was actually a UTEE'd piece I did at the workshop last week and make a complete pig's ear out of lol, so I left it out of the print tray and decided I'd do something with it when I got home, I alcohol inked up some 160gsm paper with terracotta and gold ink leaving a little bit of white which I then distressed using Forest Moss Distress ink! ( it gave a very cool 'rusty' look which I was after)! I then over stamped using the Artistic Stamper's Tick Tock flowers stamps! I stamped two big flowers, one small one and a leaf which I then made into a 'rose'?!

Tall vertical box -
Is supposed to be 'Mecano pieces lol They are off cuts of grey board really, I just drew round and ice lolly stick, painted them silver, alcohol inked them and then punched holes, I 'screwed' the pieces together to form the letter " A " using brads! Turned out rather cool I think lol!

Small vertical box

Is another UTEE'd piece this time it contains a 'keyhole' bracket which was alcohol inked, and old key and a couple of screws.


Oh ! and the pendant thingie hanging from the space is an old broken key fob which I just obliterated the cutesy image with yet more alcohol ink!

I just added some spare screws a couple of paper clips and that beaded wire thingie was actually wrapped round a candle!

A piece that's NOT to everyone's taste I'll admit but I kinda like it, I has a bit of recycled industrial feel to it! And it's also just a wee bit of fun!

Thanks for looking in

Take care

Jackie x

Wednesday 26 October 2011

WOYWW 125

EEKS!! Very very 'messy' today! I've just finished that print tray that I started at the weekend at Jenny's workshop ! So all the bits 'n' pieces are still lying around from doing that!! Label printer, meltpot, glue gun, headphones for my phone (I like to listen to music while crafting! Nothing like a bit of heavy metal to get the creatitivty running) lol. Oh yeah and I wonder who's spotted my 'snack'! lol! Yep I love my mints! lol

So hopefully Julia will forgive me today! I somehow don't think I am going to get much crafting done today because a good tidy up is needed methinks before I start on a commision I was asked about last week!!

Thanks for dropping by

Take care and have a great day whatever you have planned

Jackie xx

Workshop project finished!!

YAY!! I finished my Tim Holtz print tray off today! I shut myself away in my bedroom/craft room all day today and just got on with it!


Now I'm HOPING this will post because I've had sooo many problems with Blogger today! It's been deleting comments, not uploading post and just generally being a complete P I T A !! ( pain in the a** ) !!


Anyway, here's the finished project ! Hope you like it because I love it! It's a great way to practice new techniques! :D

I'm not going to go through ALL the techniques used because we will be here for an eternity !! lol but here are a few close ups of some of the pieces!


Thanks for looking in ,

Take care all

Jackie x

Monday 24 October 2011

Sunday Stampers week 177


 For this weeks challenge over on Sunday stampers I decided to post a piece from  the project that I started at Jenny's workshop on Saturday. Here's a box that I finished off today from the Tim Holtz Configurations Print Tray!

Some old music backing paper which I had distressed and stuck down but I thought it was a tad 'bright' so I sprayed some antique brown and gold spray inks over the top to dull it down. Some " porcelain " leaves and a little wooden bird ornament that was painted then over stamped using the 'imperfect' stamping technique! lol...that technique seems to come naturally for me these days!! lol Added some charms of pearl beads, jump rings and paperclips to the bottom of the wee birdie!

Thanks for looking in

Jackie x


Sunday 23 October 2011

Workshop project! (unfinished)

Well what can I say!! I had a fantastic weekend! Thoroughly enjoyed the workshop yesterday! Learned sooooo many new things, techniques met some wonderful people and just generally had an absolute hoot!

Sadly I didn't get my project finished but I didn't expect to really, because there were a lot of techniques that were very 'involved' which I hadn't done before, but I DID have so much fun learning how to do them PROPERLY! lol

Jenny was absolutely wonderful, put me right as ease and told me to stop panicking! lol....I did struggle with the UTEE porcelain flowers but as I have a metlpot anyway I'm sure I can try again and get them right this time! I must admit though, I just LOVED the gold leafing!! That little lizzard is so adorable! I would never have thought that a little toy rubber lizzard would look so cool! :D Isn't he just sweet! Think I'll call him " Lemmy " !!

I am glad I did this workshop because I was really swithering as whether I should or not because of finances, but I'm glad I finally made up my mind to be 'selfish' for once because it has helped me make up my mind in which direction I want my crafting to go! It was also a bit of a confidence booster as well, because the lovely ladies ALL helped and made me realise that I'm not quite as bad as I thought I was at this crafting malarkey after all!

Here is a photo of what I managed to get done on Saturday, now bear in mind it's NOT finished and no doubt I will probably play around a bit with the layout and add in some extra bits and pieces using the techniques I've learned over the weekend lol....I also want to add some wording to that big empty space........lol....


A MASSIVE big THANK YOU to Jenny and the ladies ( my brain has gone AWOL and I can't think of their names at the moment :o) and everyone at Pickleberry Papercrafts for being such lovely people and making my day very special indeed! :D

So I am now going to have a loooooong hooooooot soak in the bath and rest up! I'm aching lots after a long bus journey from London to Glasgow :(


Thank you for looking in,


Take care

Jackie x


Thursday 20 October 2011

Strange doodles!?

I'll say! Think my pen was possessed!

I was just mucking about with a Biro and a note pad! I have NO IDEA where it came from and what it's all about but I think it's a bit different!

I may just try and do some more of these things but on 'coloured' backgrounds....hmmmm...as long as it doesn't involve drawing anything 'lifey'!! lol

I'm nearly all packed and ready for my weekend, just got a couple of bits and pieces to do then an early night for me I think. Got a reeeally long day....I can think of better ways to spend a Friday rather than eight or so hours on a bus! *sighs*  Not to worry because it WILL be worth it! :D

Take care and have a great weekend whatever your plans,

Jackie x


Wednesday 19 October 2011

WOYWW 124

Yep! It's THAT time again!! Time for a nosey round other work desks in the land of craft thanks to Julia !

Here's mine this week.... a wee bit tidier than it should be but that was after having a tidy up after finishing off a couple of projects earlier in the week.

Got lots of 'bits' hanging from the handles of the wall units to keep them out of the way lol. My 'Inspirational' book is lying ready for some inspiration! That odd looking bag is holding my 'to do' projects and I made it for a college project I had in graphics earlier on this year(project being to design a logo) . I'm not sure if I'll get anything done today though, I have to dye my hair a lovely shade of purple! (my usual colour! It sure beats white!) lol...because....I'm off on a craft workshop this weekend! :D So need to get some 'stuff' together for that.!

Anyway, Take care have fun and happy crafting,

Jackie

Monday 17 October 2011

" C " is for........

Cheeky Teenager!! lol...


I bought this giant papier mache letter C aaages ago! It's my son's first name initial!

I have been planning on doing sopmething with it for a long time but only got as far as painting it!

Anyway! I used Blonde Moment Suet Black Acrylic paint to paint the whole letter. Set it aside to dry while I printed off some images!
I printed off some logos of his favourite band as well as some photos he had taken during a "meet and greet" with them!

I used the logos as a backing paper and stuck them down using pva glue. I then cut out the 'bodies' in the photos and stuck them down on top of the backing papers. Left it all to dry them 'varnished' it with pva glue!

Not my most favourite of craft pieces but needless to say my "cheeky Teenager" loves it!!

Thanks for looking in,

Take care

Jackie x

Sunday Stampers Challenge Week 176 !

This weeks theme over on Hel's Blog is "Leaves"!

For this I have done another tag, now please forgive me but I would like to put together a little 'Tag Book' for my Art Portfolio for college! I applied for a place on an NC Art and Design full time course at the local college, not really sure if I'll get a place though because I don't really "do" drawing! So want to show off what I DO do to it's very best, if you get my meaning.......anyway....I digress.

Started with a plain white tag, stamped the leaves from Tick Tock flowers from the Artistic Stamper in clear versamark and then heat embossed them in white. I then distressed over them using, Dried Marigold , Wild Honey, Fired Brick and Forest Moss Distress inks. Gave the whole thing a wipe down with a tissue and it gave me a 'faux resisit' look. I stamped out two leaves using Archival black then just Distressed them in the above colours. The THIRD leaf is stamped using clear versamark and Copper coloured Embossing powder. I Distressed this one using Fired Brick, Dried Marigold and Wild Honey because I wanted more of a 'red' colour on this!

Just finished it off with a piece of brown ribbon. Sadly the photo of this tag does not do the colours justice at all! It's is a lovely fiery red and orange colour! Very Autumnal indeed!

Thanks for looking in,

Jackie x


Friday 14 October 2011

Recycled Picture frame


I found this horrible nasty MDF picture frame in a skip/dumpster!! It has a perspex/plexiglass panel studded to the front and it was very badly marked! (probably why it was getting thrown out) lol

Soooo...... after getting permission to take it, I brought it home and had a wee think! I KNEW I could SOMETHING with it!

I managed to prize the studs off the 'glass' panel and remove it. I then sanded down the whole frame and gave it a couple of coats of cheap white 'mixing' white acrylic paint ( I don't have any gesso) :( I put it aside to dry and then stamped out those gorgeous butterflies from The Patchwork Butterfly themeplate from Chocolate Baroque ! I coloured the images using Inktense Watercolour Pencils!! LOVE these pencils! Such lovely rich colours when they are 'activated'!


Onto the Background!....When the paint was dry I randomly dabbed on some Adirondack Eggplant paint then gave the whole thing another coat of white acrylic, this time it was quite runny so that the colours would blend a bit better. When THAT was dry I randomly scribbled with the Inktense Pencils (Teal Green, Fuchsia and Sea Blue) then gave it another coat or runny white acrylic to blend those in!

When that was dry I sprayed over some Glimmer Mists ( Periwinkle, Spring Mint, Robin's Egg Blue and Wheat Fields)  Then set the whole thing aside to dry and nipped downstairs for a coffee!! lol


I Stamped the Butterfly images,  The scrolls and the verse is done in Archival Black, onto the background using the Archival Whispers Inks in Rio Purple, I then over stamped them in Clear Versamark and used some Sparkle and Shine Gilded Ivory Embossing powder, slightly offsetting the images. I then cut out and stuck down the Butterflies again offsetting them against the background images.

Now onto that horribly marked 'glass' panel. It didn't seem to matter what I did to 'clean' it you could STILL see the horrible nasty marks....sooooo.... I decided to do an acetate overlay! I printed off the phrase from the Butterfly Whimsy again from Chocolate Baroque . Now as the sheet is slightly smaller than the actual 'glass' I had to find a way to stick it down without ruining the whole thing with glue showing! So I dug out an original Sizzix die (Hinges, mounts, handle and photo turns) I just glued these to the acetate sheet, so that they would reach the holes for the studs when I put the 'glass' back on! A wee bit of a 'cheat' but it worked out well and hid the glue! The Acetate overlay doesn't totally hide the marks on the panel but it does not too bad a job! :)

After the 'glass' was re-attached I 'distressed' the edges using the Archival Whispers inks in Azure Seas and Rio Purple. I thought it was a nice way to finish things off.

It wasn't really a massive project but DID involve a lot of prep work which took a bit of time! Just as well I have a fair bit of patience then isn't it! lol

Anyway, thought you'd like to see a little close up of what the frame looked like BEFORE I got my hands on it.....lol...


Horrible innit!? lol

The photos are clickable if you want a better look.

Thanks for dropping by, take care and Happy Friday! :D

Jackie x

Wednesday 12 October 2011

What's on your workdesk?......

THIS lot !!  It's time for WOYWW challenge!! 'Tis a wee bit messy this week, lots of stuff getting prepared for sale (I hope), I'm fed up having no job and no money! Aaaarrggh!! So NEED to try and get some cash flow coming in other than Jobseekers allowance! :( Anyway I digress, there is a project that I 'prepped up yesterday sitting underneath my errmm...'Art Journal'! Yeah that's the words.....Art Journal...lol...but shhh...it's not really, just a place where I try out some ideas, take notes and generally just a 'mish mash' of 'stuff' that's in my head!! lol...

I've got a fair bit going on personally at the moment and just can't quite get into a 'routine'... * sighs*.... but I'll manage!

I have just received my first proper commission and it's an absolute corker! Talk about a baptism of fire!! I have to make three boxes! One has an Iron Maiden Theme, the other is to look like a 'wooden box' AND.....the other has to look like the TARDIS!! They are for my big mate who is an 'analyst' and he knows everything there is to know about Iron Maiden and Dr Who so they had BETTER be as accurate as possible or else I won't get paid! lol....So all projects aside and out with the 'Art Journal' to start playing around with ideas!

Thanks for dropping by and reading my inane rambles lol

Take care and Happy Crafting everyone!

Jackie x

Sunday 9 October 2011

Sunday Stamper week 175 challenge.

Don't often do challenges but decided to take this one up! The theme is Blue and Orange! I absolutley LOATHE Orange with a passion! I just hate it! lol....Anyway, just did a quick tag.

I distressed the tag in two 'halves' then oversprayed with the respective matching Glimmer mists. The stamps I used are from The Artistic StamperThe Artsistic Stamper  and are from The Time and Keys themeplate. I overstamped the background using the small pocket watch in versmark then brushed some Interference Blue perfect pearls, sprayed a little water and then heat set it. I stamped out three keys, distressed them in alternate blue and orange and attatched them to the tag with a humungous brad! I stamped out a bigger pocket watch and distressed that. I didn't have any coloured ribbon so I just used promarkers to colour some white ribbon blue, then orange and just added them to the tag! I stamped the words using Faded Jeans ditress ink and brushed over interference blue perfect pearls...it says "Time is the Key to Life" but as usual it's obliterated with the flash!!! lol...


Anyway, just a quick challenge tonight.....I'm off to chill out then phone my friend! :)

Bye for now and thanks for dropping by

Jackie x


Saturday 8 October 2011

Art Journal.....

Well, This is my FIRST attempt at Art Journaling, I have seen so many beautiful pages being created so I decided to have a wee look at some videos and see how it's done!

Personally I think this one is just a wee bit 'busy' but it IS my first attempt and I'm quite pleased with it! It's like everything else I suppose, the more you do the better you get.!

Anyway, the background was done using two colours of Glimmer mists, Tattered Leather and Moonlight, I then added a Sticky Fingers spray , Walnut which is not so 'brown'! The stamps are the Live out Loud themeplate from Chocolate Baroque and that's the first time I've used them! Had them in my stash for ages too! I just 'dry' coloured them using the Inktense Watercolour pencils! I think that touch of colour just seems to finish it all off.

I Distressed the edges of the pages using Brushed Corduroy and a smidgen of Faded Jeans!

If you want a better look then click on the picture and it should enlarge! Sadly the light wasn't very good so neither is the photo!! *sigh*

Anyway thanks for dropping by

Take care

Jackie x


Friday 7 October 2011

Work in progress pt II ....

Here's a few more pages from my little 'Inspiration book'...

Done using Faded Jeans Distress Ink , THAT crackle stamp(again)! lol An image from Joanna Sheen Victorian Romance cd rom, The winged heart Alterations die and the words are from Chocolate Baroque Rose Script stamp.


Again using Faded Jeans ink only this time I over sprayed with Moonlight Glimmer Mist inks! The image is done on plae grey card stamped and distressed using Faded Jeans ink and then coloured using The Intense Watercolour pencils but left dry! If I had coloured it in it would have 'ran' so thought best to leave it as is. Again the stamps are the Rose Script and to be honest that set is my all time favourite!! I have used that image in loads of different ways for loads of different thing and it's going to be used continually I think! Anyway I just added some little flower embellishments to finish it off.

And now for a 'Steampunk' Style page! Done using Dried Marigold, Wild Honey and a SMIDGEN of Fired Brick! lol... I used the cogs as 'stencils' and distressed over them for the background. The filigree heart is the centre of the heart from the Winged Heart Alterations die and is textured using the Ten Second Studio Dotted Wheel tool as are the Cog and Gears which are also an Alterations die. The Flowers are from the Tick Tock Flowers themeplate from The Artisitc Stamper! A very handy and versatile little themeplate this one and I have used it a lot recently!!


Right., That's me done for the day. I'm off to get tidied up a bit and then sit down to watch a movie.

Take care everyone and thanks for popping by,

Jackie x


A work in progress...


Before I start I would just like to say a huge Thank You to everyone who left lovely comments on my blog . I do apologise if I seem ignorant in not 'replying' but Blogger seems to be playing up a little and my 'comments' keep disappearing so I have no idea if they have been received or even posted twice! Anyway, Thank you all, it is very much appreciated!


I'm just in the process of making a little 'inspirational' book for myself! It will be full of little quotes, images and techniques done just for me to cheer me up when I'm feeling blue or just to look at for a little inspiration now and again when I feel the need.


Now the cover looks decidedly 'naff' at the moment but I'll wait until I have all the pages completed and then I'll finish it off! I want to cut it down a little so that I can show off the 'tabs' on the pages!


Soo....without further ado.....here are the pages that I have completed so far!


The backing paper is from Tim Holtz Crowded Attic paper pad! And all the pages are done using this one 12 x 12 sheet! I used the Tim Holtz Alterations On the Edge dies to add 'tabs' to each page!  It's also done using just two colours! Antique Linen and Brushed Corduroy Distress Ink!

The topper is just a plain piece of card, torn and distressed, overstamped with a crackle background stamp and then overstamped again with Black Archival ink. The words and phrases are from Chocolate Baroque and a set which I adore and have used on numerous occasions!


The back of the page is just plain and again done using Antique Linen and Brushed Corduroy, this time I overstamped the whole page with the crackle stamp to give it a wee bit of 'texture.  The tag was just plain white, again distressed using the same two colours as above, only this time I sprayed some Antique Brown Stain ink and Also some Glimmer Mist, which has picked up the light from the flash and practically obliterated the phrase on the tag!! *sigh* ! Again the words are from Chocolate Baroque . I just added some square gems and a piece of ribbon to finish things off.


THIS page is done using just ONE colour! Fired Brick ! Now be careful with this one because it's such a strong colour and you don't need a LOT of it! I found that out!! lol...anyway it turned out ok so I'm not too bothered really.
The backing is stamped using the crackle background stamp then over stamped with hearts in Black archival ink. The heart image is From Joanna Sheen Victorian Romance cd rom and was left over from the Steampunk Canvas I did earlier. I distress it, overstamped with THAT background stamp lol! 'Swiped' over some Interference Blue ink and then overstamped with words from Chocolate Baroque . The cupid is a Sizzix original diecut (the green one)!


This page is done exactly the same as the previous one. I just added another spare image I had left over from the steampunk project only I cut the edges with the Deckle Edge scissors and distressed it slightly, the Double Heart is again and original Sizzix die, overstamped and distressed, and the words ans hearts are again from Chocolate Baroque.


This is just a quick photo of what the paged looked like BEFORE I got my inky mitts all over them!! lol

I'll keep you updated on how this project progresses as and when I get the other pages done!

Thanks for looking in

Take care

Jackie x

Wednesday 5 October 2011

What's on Your Workdesk! Wednesday!

No Flaming wonder I can't find my 'Mojo'!! Methinks a tidy up is in order!! EEKS!!

I found this challenge through Jennie at over here  by accident really but I was always a wee bit embarrased to show my mess off!! So I'm throwing caution to the wind and having a go!

So here's my first entry for the What on your Workdesk Wednseday Challenge . !!

 I've been REALLY struggling with 'life' things at the moment and I'm a wee bit 'all over the place' just now! So I've spent most of my time blog hopping and just reading lots of lovely stories and getting some inspiration from all the wonderful blogs I've been looking at.

My desk is still messy after finishing off the project that you see lying on top of my 'sketch' book! I DID start out tidying up yesterday but came across a few things that I'd 'forgotten' about! (or in crafters; terms....lying underneath a pile of stuff)!! lol .... and well...you know how it is....before long you start 'playing'....lol.

Sooo I'm going to leave it at that and head off to get that 'creative mess' in some semblance of order?!

So thanks for dropping by and take care

Jackie xx

p.s.  I'll bet I've just made all the 'messy ones' feel SO much better now! lol!!


Tuesday 4 October 2011

What to do when your 'mojo' takes a break!


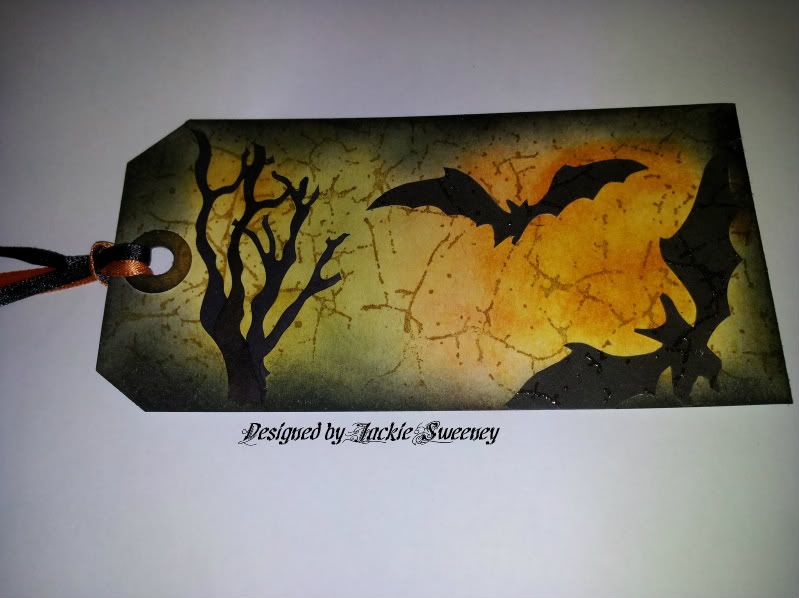
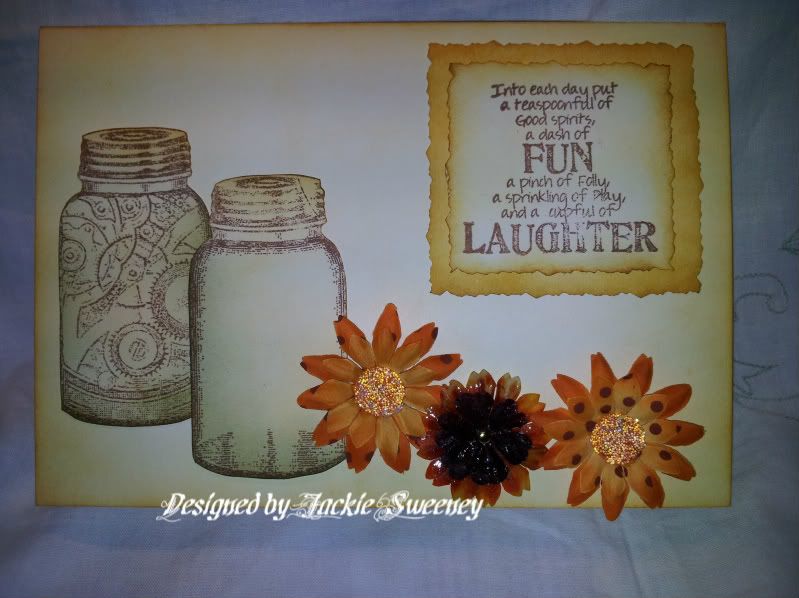
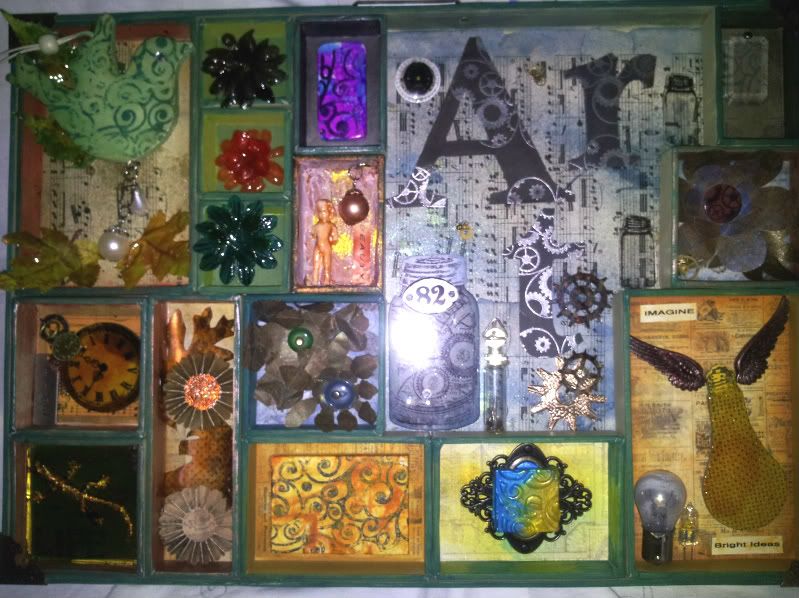
Well, the 'Mojo' has decided to seriously 'naff orf' this weekend....soooooo...what do I do to get it back??? Other than sitting at my craft desk for aaaaages trying to come up with some ideas....I decided to have a little clear out! To say that it lasted all of about five minutes is an understatement! lol....I had a pile of images that I had printed out at sometime or another for some project or another, that had one cut out for something or other....*rolleyes* (you know how it is) lol ... sooo while I was seeing what was there things just kind of seemed to 'fall together'! I must admit I just LOVE it when that happens!....


Anyway, I digress, The images are from  
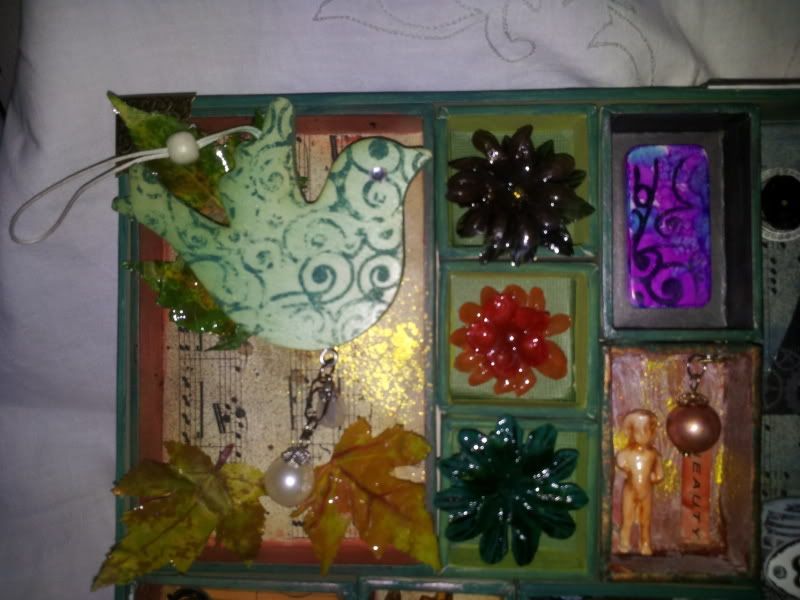
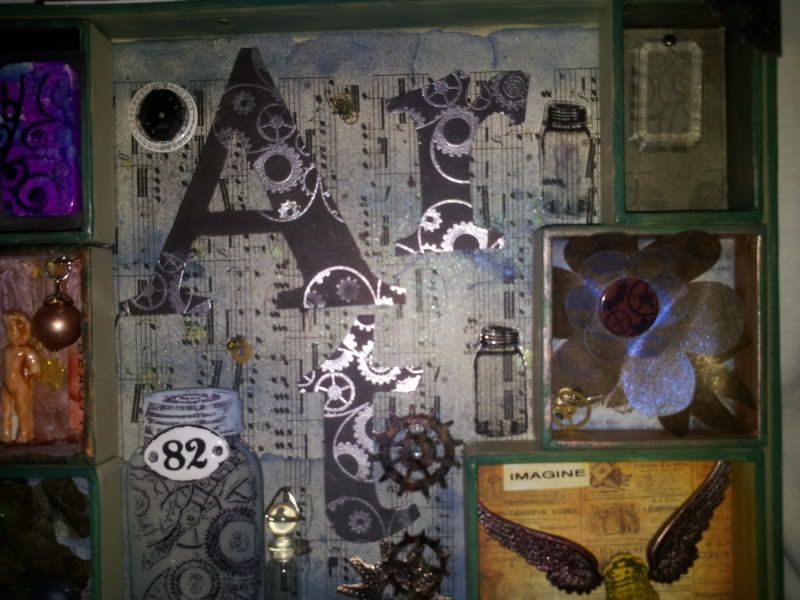
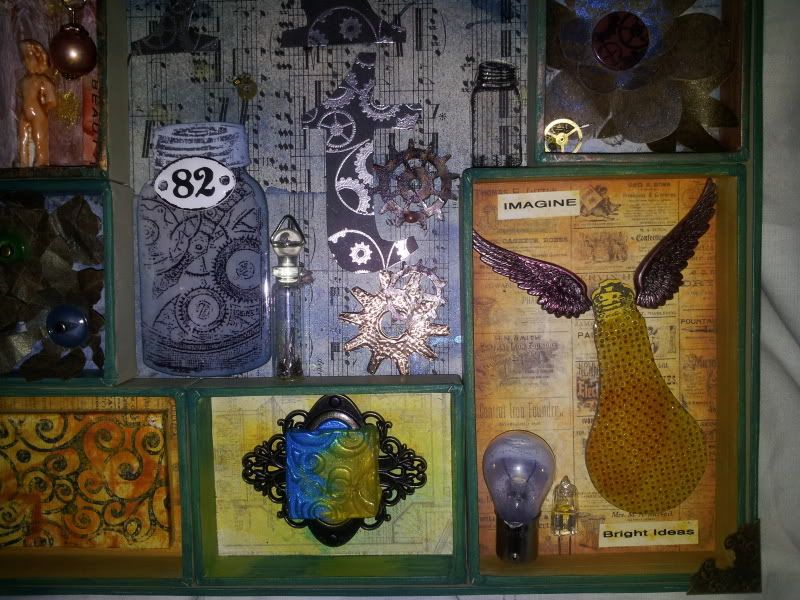
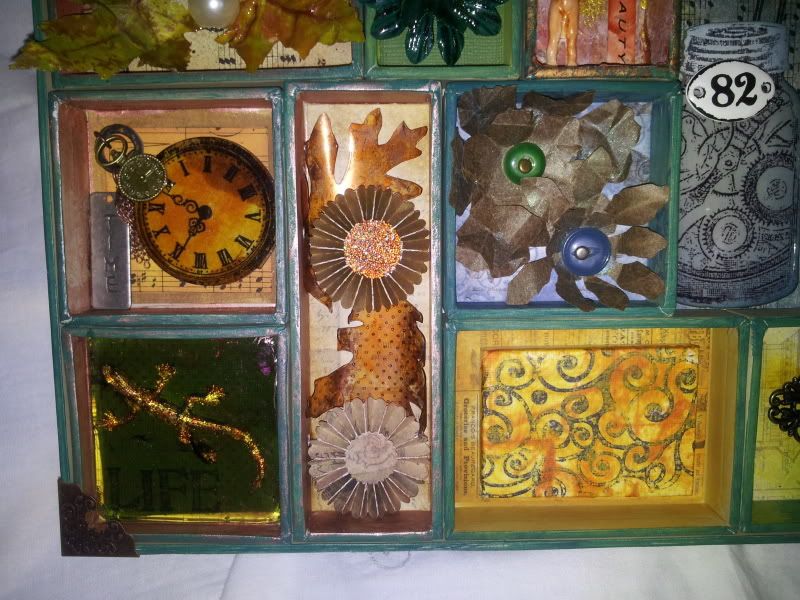
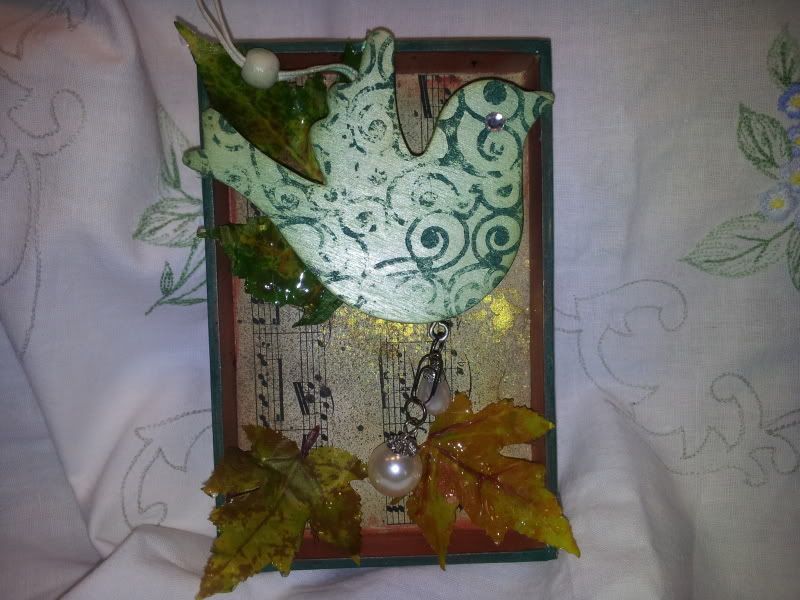
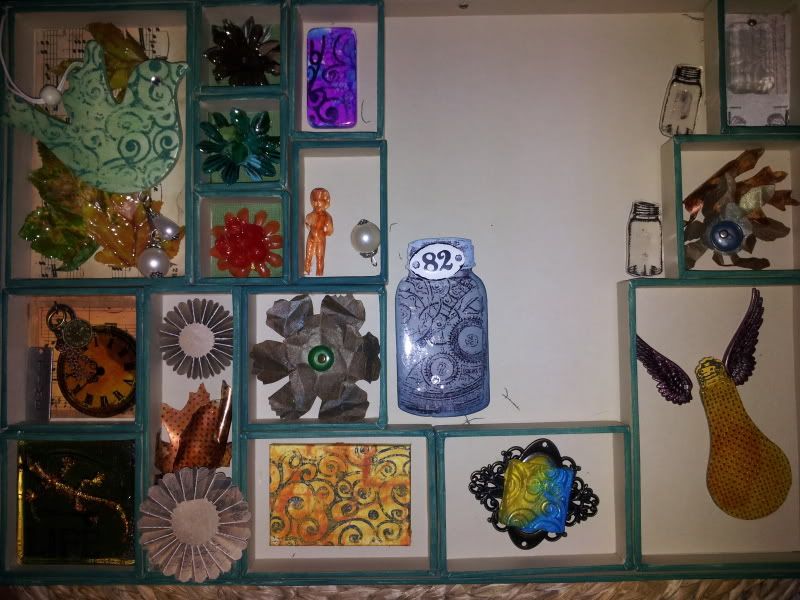
Joanna Sheen Victorian Romance cd rom, so I cut out my favourite ones and put them to one side, while I was tidying away the other pages of images, that done, I came to my 'box of bits'...which was full of diecuts and embellishments...blah blah blah...proceeded to find the Tim Holtz Alterations diecuts of the Winged Heart, The Bird and Cage and the Cogs and Gears, which had been cut from Ten Second Studio Art Metal in copper! I Also found some flowers I was going to use for another project, these were stamped using The Artisitc Stamper Tick Tock Flowers themeplate, and then distressed. I also used the Tick Tock butterflies from the same range (if you look REALLY closely you can see THE most cutest little steampunk snail!) While I was 'rummaging' I came across some little bare chipboard hearts, these were coloured using Twinlking H2o's , overstamped with the tick tock flowers then heat embossed with gold detail embossing powder,  some old playing cards, scrabble tiles and some ribbon roses!


Soooo, time to TRY and see what I can come up with this newly 'found' stuff! lol.....

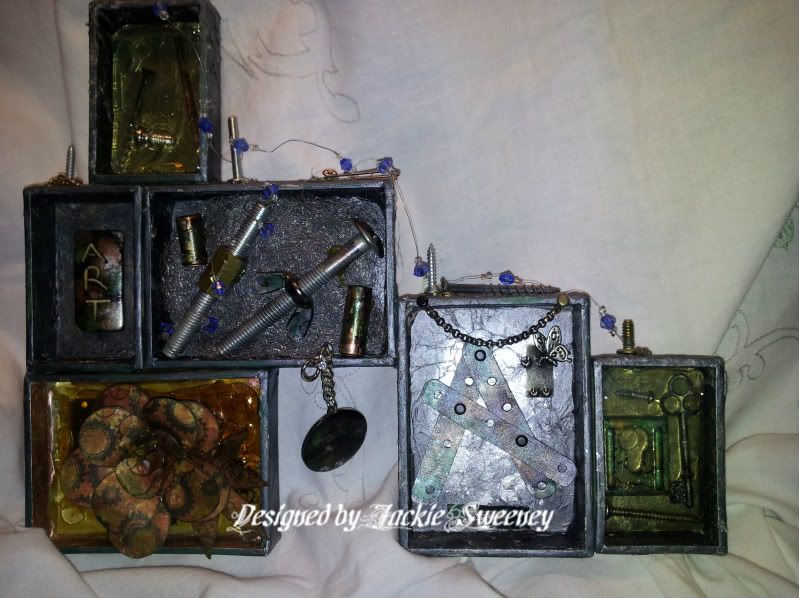
1 blank 8 x 8 deep edge canvas, Which I washed over with water then sprayed using Glimmer mists, put aside to dry while I faff about with the other stuff. I adore that hot air balloon image so because I had a few of those I decided to do a wee bit of decoupage, I had some matching backing paper so I used the Denim blue Distress ink and distressed the edges, I have had those 'bubbles' for ages and because I don't really do a lot of decoupage they were stored away at the very back of the cupboard. I coloured the edge of the bubble using a gold marker, let it dry, 'scratched' it then rubbed over it with Archival black to distress it because it was just too 'new' looking, plus the fact that it would hide the glue when it was stuck down over the decoupage! I just added some ribbon roses and scrabble tiles to the image before it was all put together.

The rest of the piece just seem to fall into place really, i used a couple of fancy shaped metal brads for the flower centres, then stuck them down at the bottom of the bubble. The die cuts were just 'plain' so I used The ten Second Studio 'Dotted Wheel' tool to give them a bit of texture, a small wire brush and some Archival Black ink aged them up a little, The heart was made to look like it was riveted, just using the Ball and Cup tool, ( I was pleasantly surprised at the way that turned out actually)!

I just finished off the piece with the butterfly and the snail which were stuck onto the bubble and i then added some 'steampunk' watch parts here and there to match in with the cogs and gears theme!


Some close ups of the smaller pieces.....


Soooo there you have it.....What i did to find my 'mojo' again!

now this piece may not be to every one's taste but it just simply reminds me of ME and my brain at the moment! Suitably cluttered with a whole load of 'stuff, but I am thrilled to bits with the way this has turned out, seeing as it was an experiment! Mixing the old with new really work with this piece and I think Joanna Sheen's Victorian cd's really lend themselves well to the Steampunk theme!

So Thank you all for reading through this 'novel' of a post lol, and it just shows that sometimes when the mojo DOES take a break then so should you, go and do something else and while you are doing that more often than not other ideas come to mind, if not the don't worry, because I feel the harder you try to get it back the less chance it will do so! A bit like teenagers really, disobediant and defiant!! lol.

Take care everyone and thanks again for dropping by,

Jackie xx

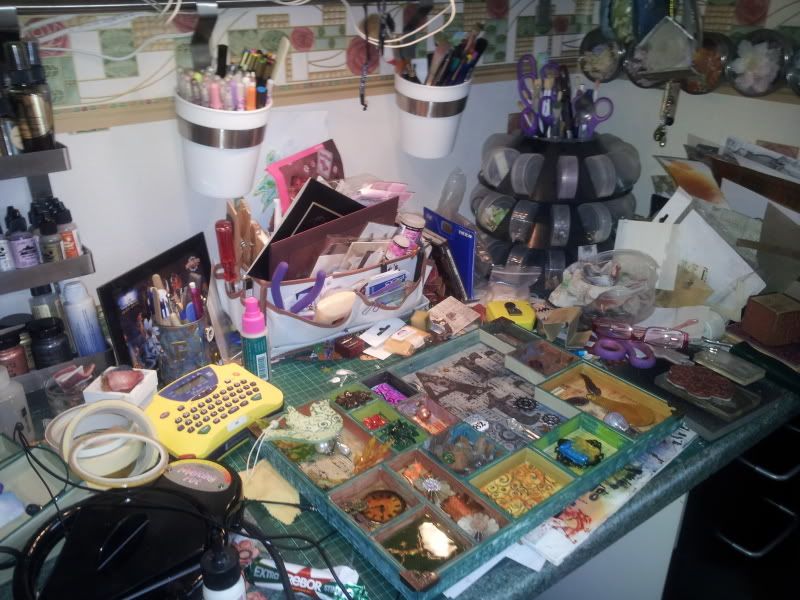
p.s. my craft room seems to be in a bigger mess NOW than what it was BEFORE I started clearing it up ... *sighs*.... lol